Sketching ✎

Today we explored sketching as a mode of prototyping during a short workshop conducted by Johannes.

What is Sketching?

A sketch is a rough design of what you want to present. It’s a pictorial representation of thoughts, images or a mental picture in your mind. It can be an idea or a concept. There’s also the concept of paper-prototyping. Sketching and Paper-prototyping utilize similar tools, such as pen&paper, Illustrator, Photoshop, Keynote, Arduino, Processing, and so on. However, paper-prototyping includes complex paper constructions as well.

What is paper-prototyping?

Image result for paper prototype gif

Paper Prototyping is a prototyping method in which paper models are used to simulate computer or web applications. After initial design, a paper prototype is drawn on plain or construction paper.This a lo-fi, cheap and easy method of prototyping, just like cardboard-prototyping.
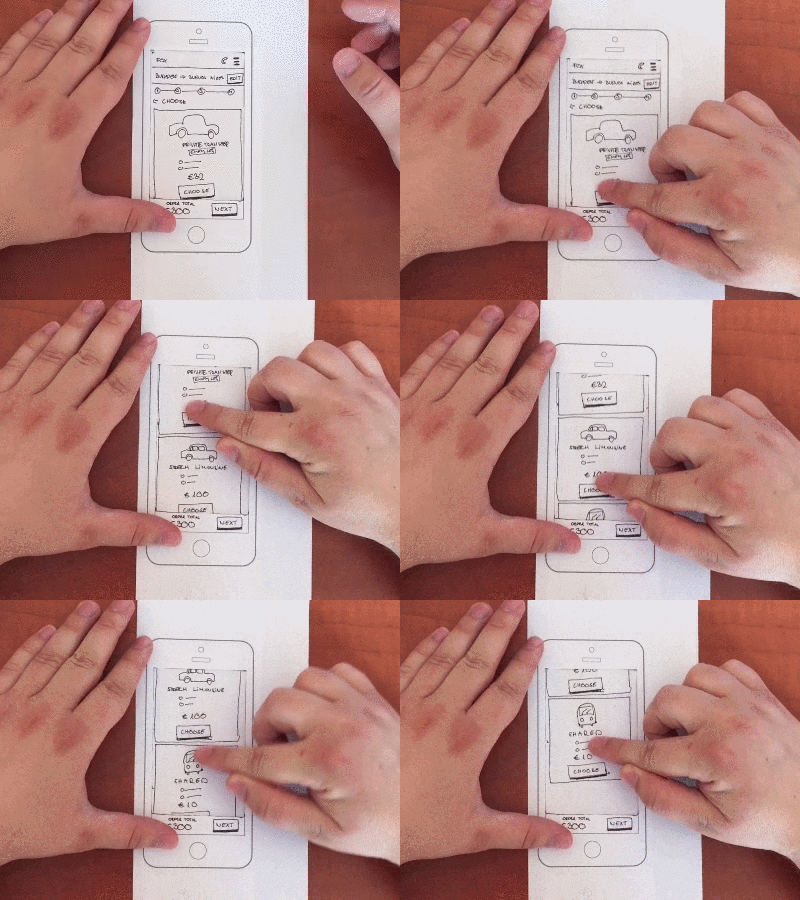
Image result for paper prototype gif

Paper prototyping as a prototyping method relies on tangible objects for usability testing and functions under the assumption that the user will interact with the paper application as he or she would with a real application.

We were introduced to the method of paper-prototyping, but today the focus was on sketching only.

Sketches are an important part of the design and development process. Sketches help to convey ideas, demonstrate functionality, visualize user flow, and illustrate anything that requires human interaction. UX designers have to generate concepts, communicate ideas, map processes, or simply problem solve throughout each project they work on. The difficulty is always how to share these ideas with clients without using up too much time or money, or hiding away and working on a problem to find you’ve missed the core project objectives that your client was expecting. The best way to quickly, easily, and comprehensively communicate with both the team and the client is to share sketches throughout the whole project. Not only does this help articulate how one plans to tackle a problem, but by thinking out loud on paper, it allows everyone to see how ideas begin, evolve, and work towards the solution.
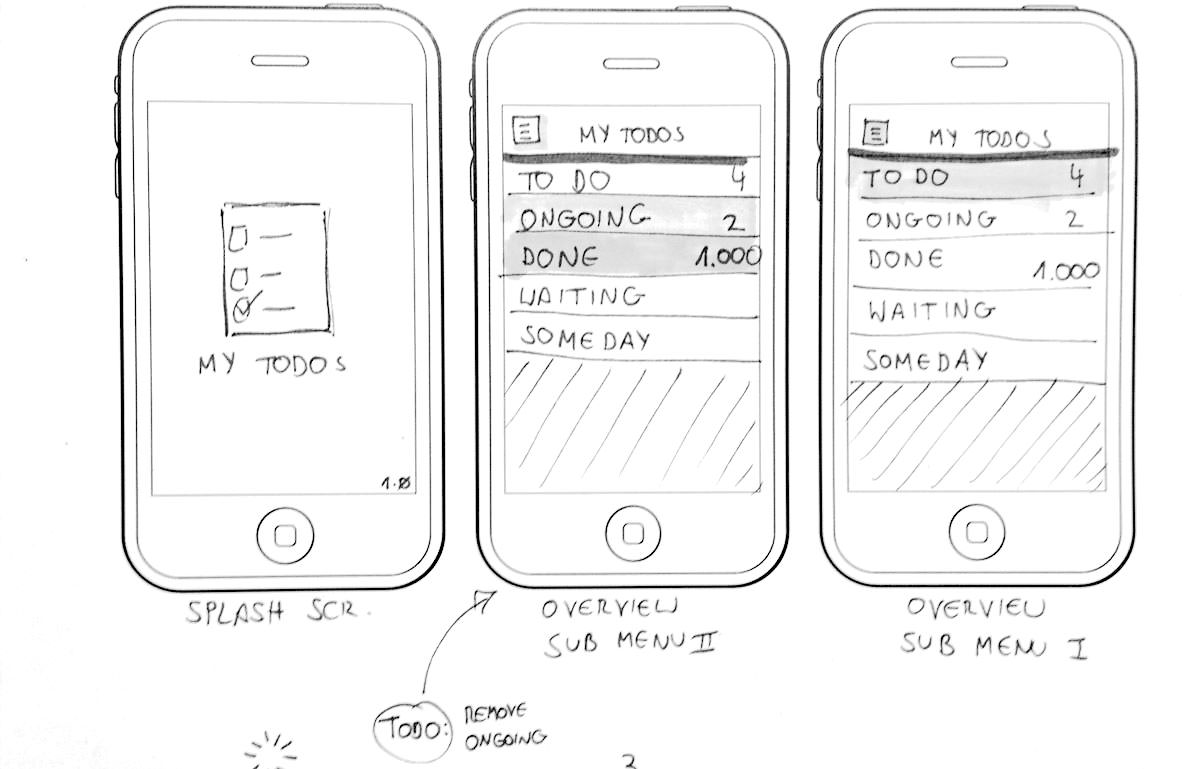
Sketching in UX design taken from Smashing Magazine

It’s important to iterate ideas during a design process, that’s why sketching is a handy form of prototyping.

Sketching Exercises

Exercise 1: Sketching Dieter Rams… upside down! (10 minutes)

Goal: Focus on shapes instead of objects. The purpose of the exercise is try to escape from trying to draw an actual portrait of a human but to perceive the portrait as a series of shapes and shadows. This help heighten observation skills.

Results:

Reflection:

Not quite an accurate sketch, is it? The proportions are completely off, since it was definitely a challenge to draw a face upside down. However, I felt that I was still trying to focus on drawing the figure and making it as realistic as possible, instead of perceiving the face as an oval, two small circles, a triangle, etc, I still sketched while thinking head, eyes, nose, lips… and so on. In the future I will consider letting myself go and perceive objects as shapes instead and see how the results will turn out.

Exercise 2: Five frames of your morning routine using star figures (2 minutes total)

Goal: Star figures > Stick figures. Johannes emphasizes that they can carry the same characteristics as stick figures but you can draw them as a foreground or a background as they afford overlapping each other. This is a simple exercise just to practice drawing star figures.

Results and Reflection:
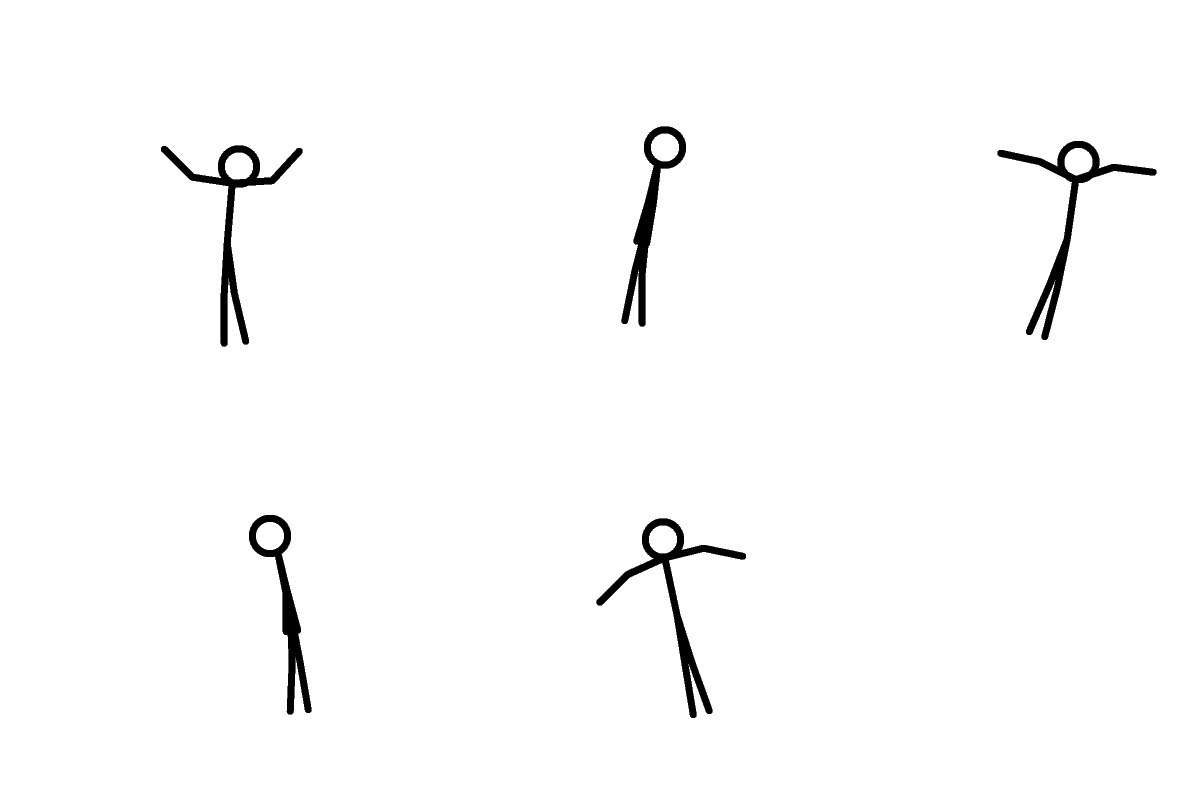
Related image

Human figures are commonly used to sketch out the “user” in a specific environment or context. Therefore, it is important to learn how to draw human figures in the most simplified way possible. I definitely prefer star figures as well as it somewhat brings a sketch to life but not being messy scribbles and lines.

Video prototyping, how, why, for what?

“It’s not uncommon to use several prototypes to create a single product”
–Dan Saffer

In addition to cardboard and paper prototyping, we’re now introduced to a third technique– video prototyping. The use of prototypes is communicate and evaluate an idea, and a prototype should obviously be convincing, at least to a certain extent.

Why video prototyping? It is quick but also complex, it can be both lo-fi or high-fi, it consists of element of storytelling, it’s easy to display context, shape, size, form, users, function, and behavior all in one, and you have the ability to create and demonstrate impossible situations.

Examples

LO-FI
↘high functionality with low finish
↘low functionality with high finish

HI-FI
↘high tech, high functionality and high finish

Image result for rule of thirds
rule of thirds in photography and filmmaking

There are some tips for how to create better video prototypes, but it’s important to remember there’s never a right or wrong in what you create. Being aware of what is visible is pivotal, even professional movie-makers make mistakes by accidentally including something in a scene that’s out of context. Far shots should be implemented for establishing context. Close-ups are for emphasis on detail or for creating intimacy with a character or object. Contrasting colors are what makes a video standout, unless it doesn’t fit with your context, lighting is very important, and finally, the rule of thirds is a trusty companion as goes to almost all design projects.

While creating a video prototype, it’s important to know what you want to tell/illustrate in your video, you should be prepared to tell your story efficiently, have the viewers’ interest in mind and not bore them to death. As you establish the context in the video, it’s essential to show the physical interaction and behavior between the product you’re presenting and a user, to show physical qualities of the object or objects, and finally, the video should be kept smooth and steady with both the physical video as well as the editing.

If you want to watch some projects we have previously worked on in class, see Wonder Bottle or the Netflix Gesture Exercise.

Wonder Bottle- video prototyping project

The second and more extensive group video prototyping exercise is about making a video prototype with focus on user values. The brief states to create a video that communicates some sort of a shape-changing interactive object. In the video, we must tell the story of how it is used and what user value it obtains. We’re allowed to pick pre-existing objects from example videos Johannes’ provided or come up with something completely novel.
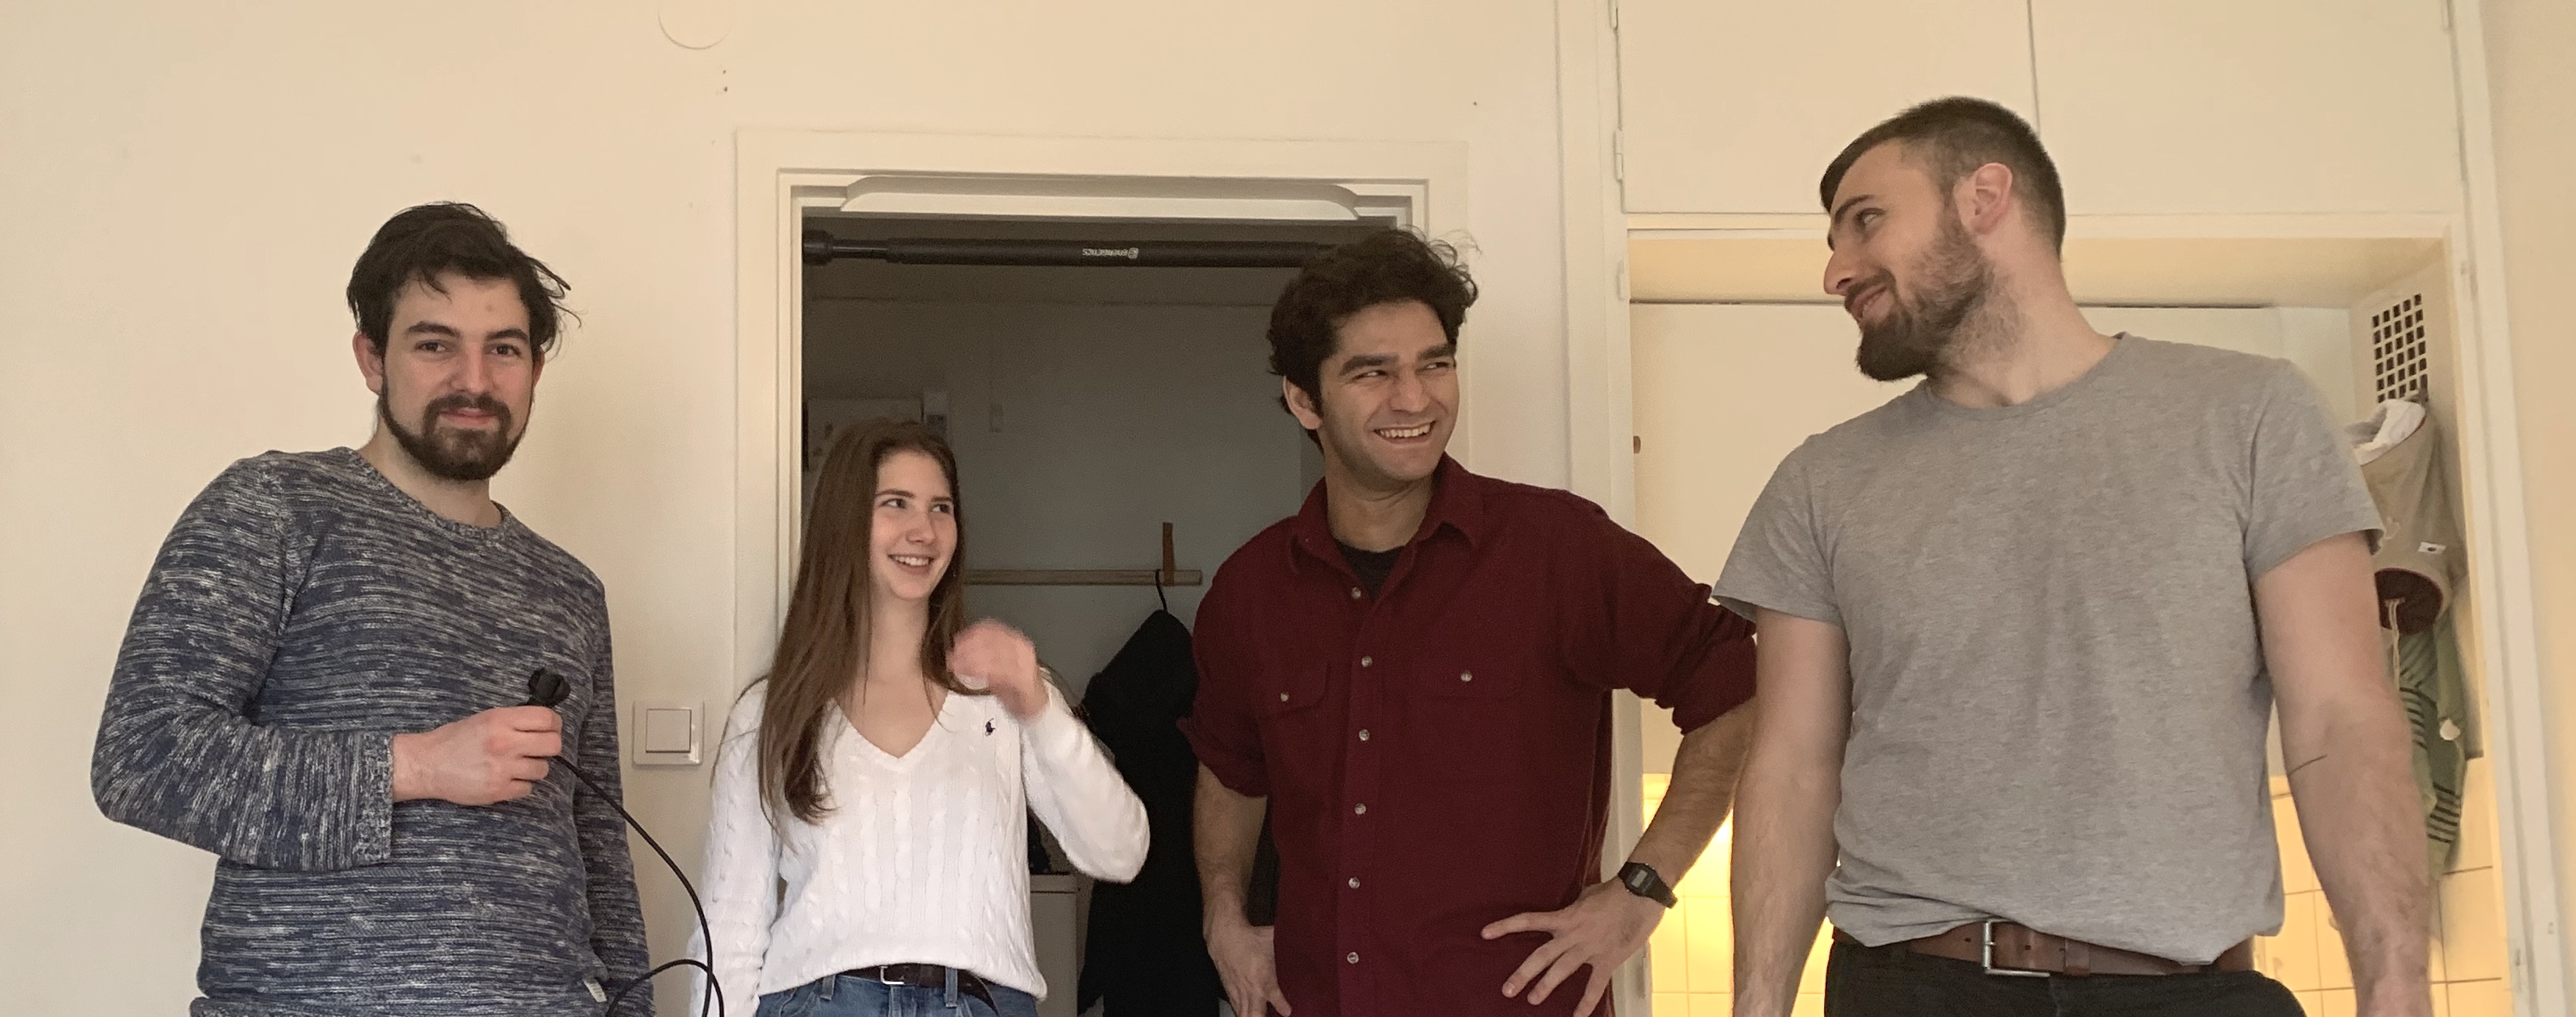
I collaborated on this project with fellow classmates Manuel Zomer, Melika Ljutovic, Fariborz Ghadir, and Bahrudin Srebrenica.

Brainstorming

After a series of brainstorming, jotting down ideas about objects us ordinary people use on a daily basis, we came up with ideas such as shape-changing apparel, pillows, phone cases, and so on. By creating something the team-members could also make use of on the daily would make it easier for us to convey its user values. By the end of the day we settled with the idea of a smart water bottle with different functions.

Initially, I was somewhat against the group’s idea of creating a smart water bottle. First of all, the bottle presents many functionalities, but the brief placed a huge emphasis on the shape-changing element and by including many functionalities to the bottle does not necessarily mean that it’s physically “changing shape”. As I proposed this to my fellow teammates, they were able to stray away from the technical functionalities such as a smart meter that can connect to your smartphone, into more physical functionalities and shape-shiftingness. A water bottle definitely has a user value, but how could we include a shape-shifting element? That’s when Bahr brought up the idea of an integrated screen display that pops out from the water bottle, this hopefully suffices as a shape shifting element. In addition to that, some had previously proposed for the bottle to have two compartments you can separate in order to to store different liquids or solids as well as a heating attachment to enable a cooking function for the bottle. These all sound like outrageous ideas but I guess the purpose of video prototyping is to be able to showcase or demonstrate impossible situations or objects.

Storyboard

Why do we create storyboards? With storyboards, we come prepared during the filming process. If you’re coming up with ideas and scenarios while filming, the progress would not be as efficient. With a storyboard planned out and drawn up, it decreases the chance of failure out in the field.

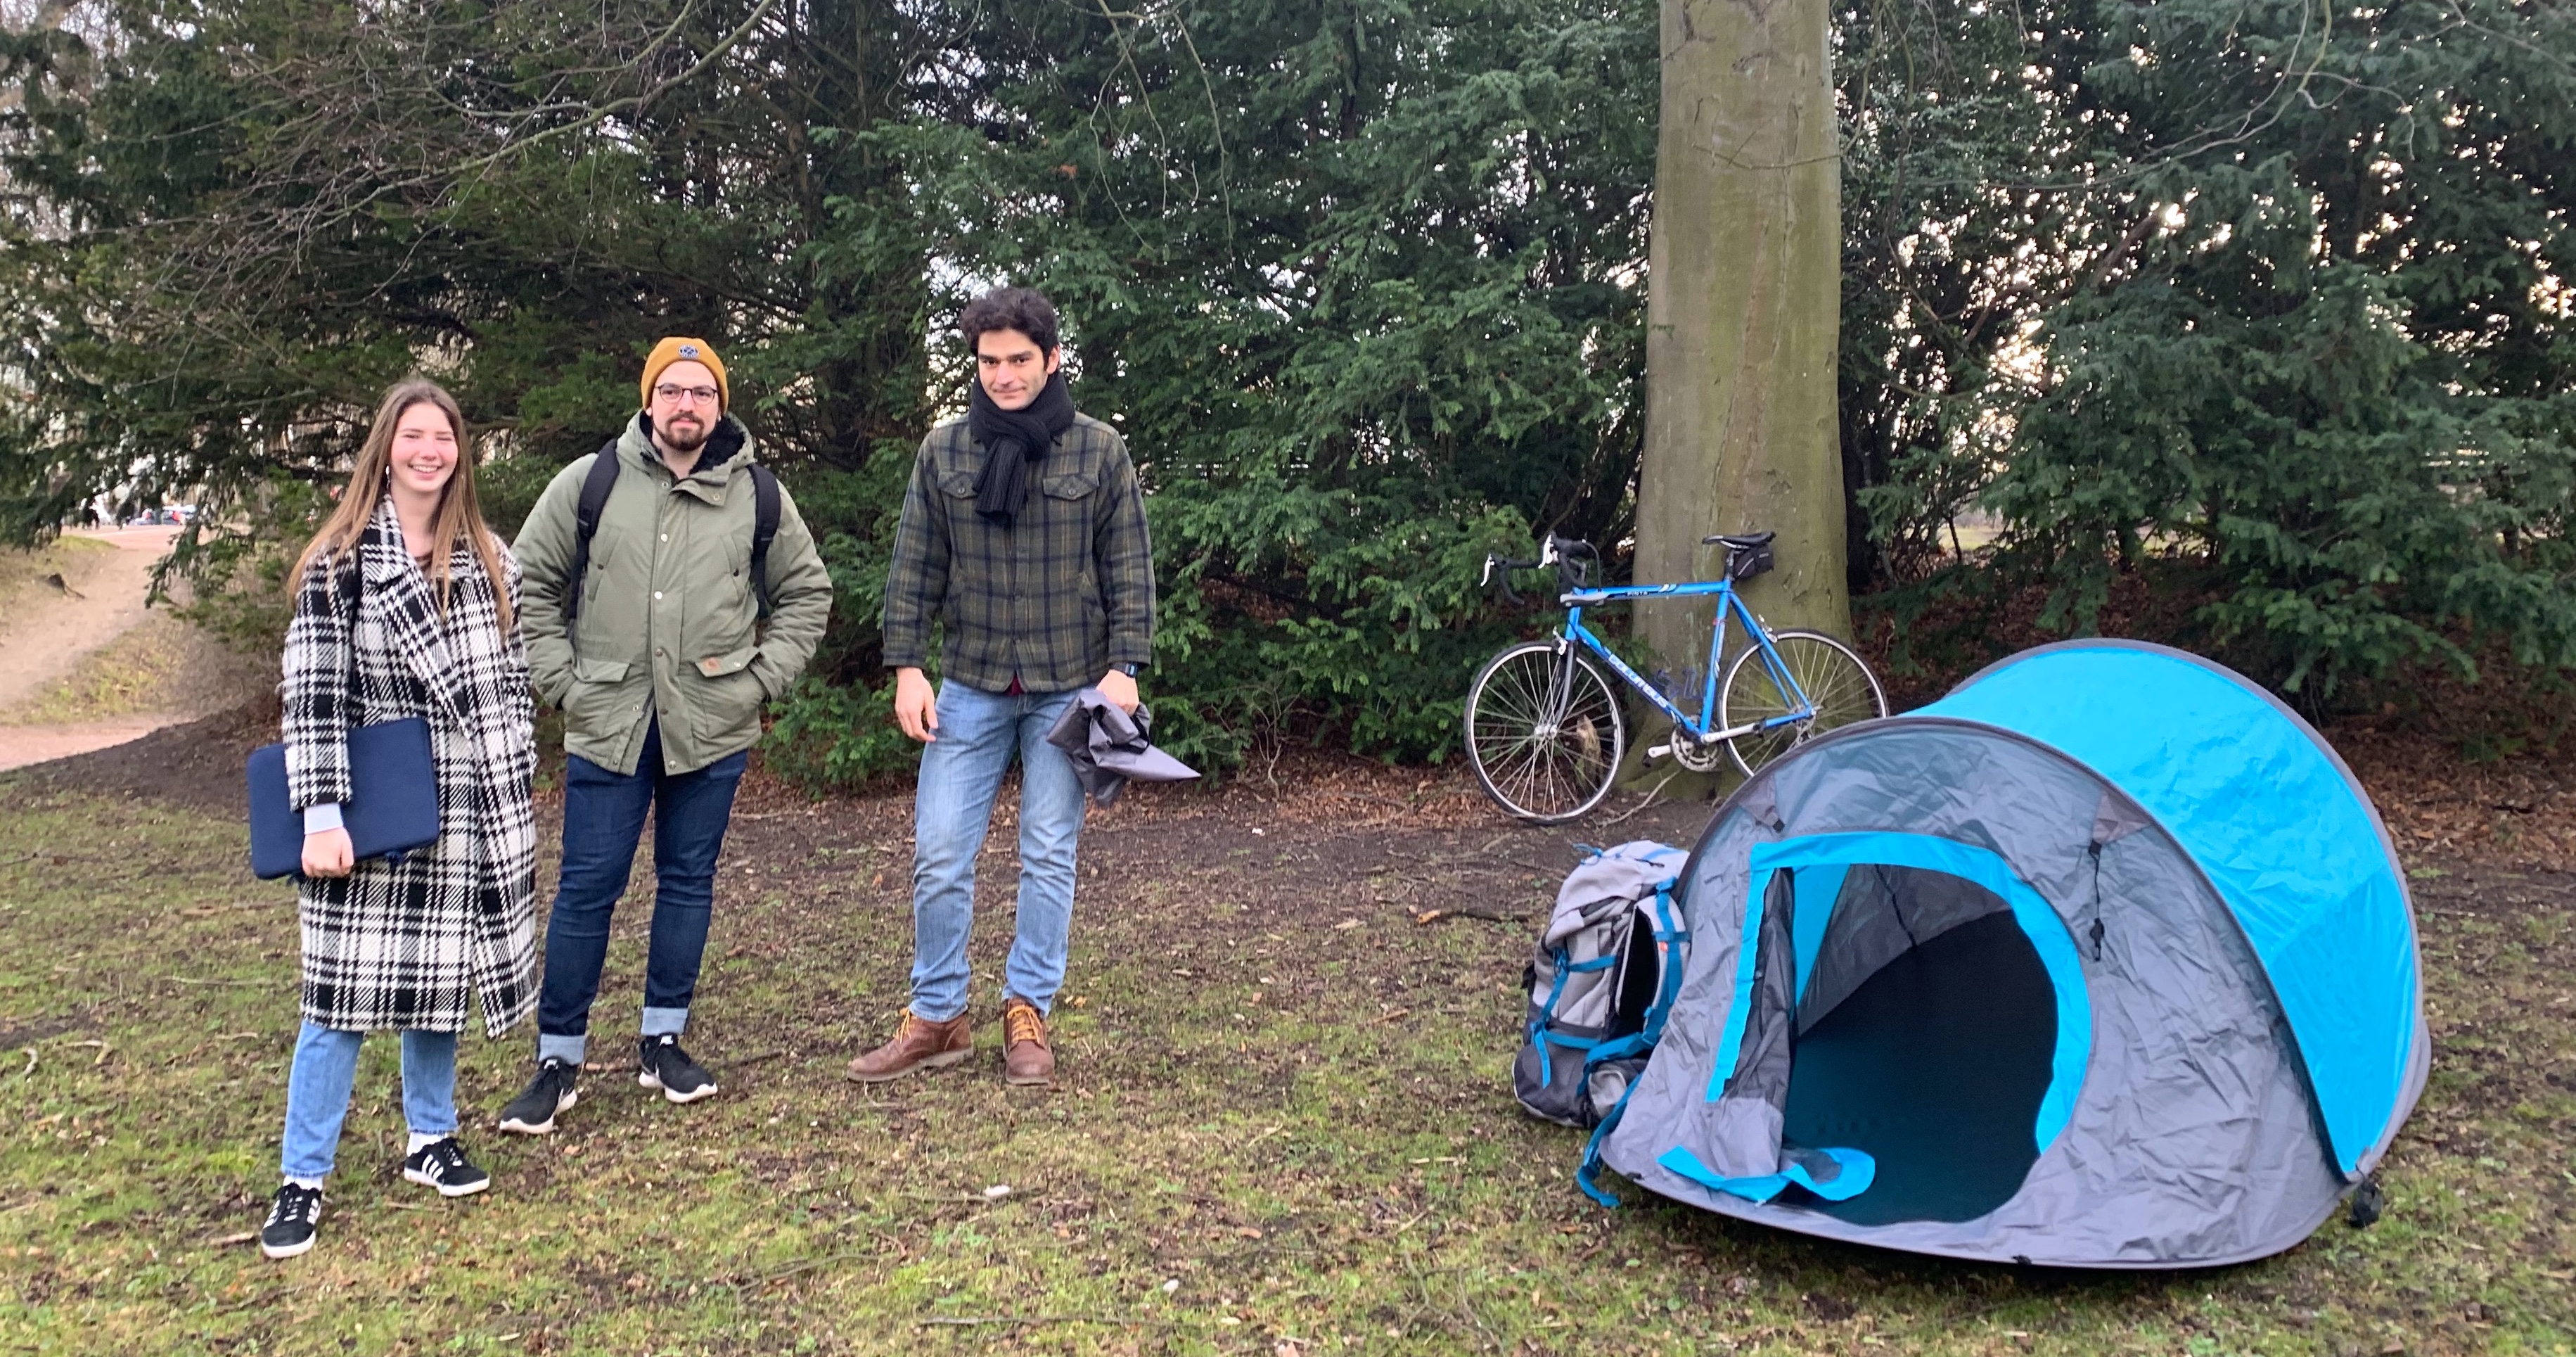
I was unfortunately unable to participate in the storyboard planning due to work but I think I have a clear grasp of what is going on in these illustrations. The setting starts in a room where the actor packs his camping gear. We have decided that the user for the Wonder Bottle will be targeted towards campers. He pours liquids into the Wonder Bottle, so the audience understands that the product we’re trying to convey is the bottle. Then the next scene cuts to the actor walking towards and walking in a park, setting up a camping tent. And finally the core functionalities and the shape-shifting elements will be displayed while the actor camps in the park.

Final Product!

The storyboard was indeed helpful for the filming session of our product. Everyone had a clear grasp of their roles as well as how the video pans out. After editing the scenes, we also incorporated animations to better illustrate what functions our bottle has. Finally, the scene I’m most proud of, is how we made the screen on the bottle actually look like a screen by implementing green-screen and chroma key compositing.

A Reflection

To my surprise, the video came out solid contrary to my fears about the final outcome. I was worried that the video would not convey our product in the best way possible, however, thanks to Manuel’s editing skills, we actually created a rather convincing video prototype. In conclusion, we actually didn’t spend too much time but definitely enough effort on this project- credit goes to the efficient team and the successful storyboarding which resulted in an productive filming process. To read more reflection on video prototyping in general as a prototyping method and a dissection of video prototypes, read here.

Photos

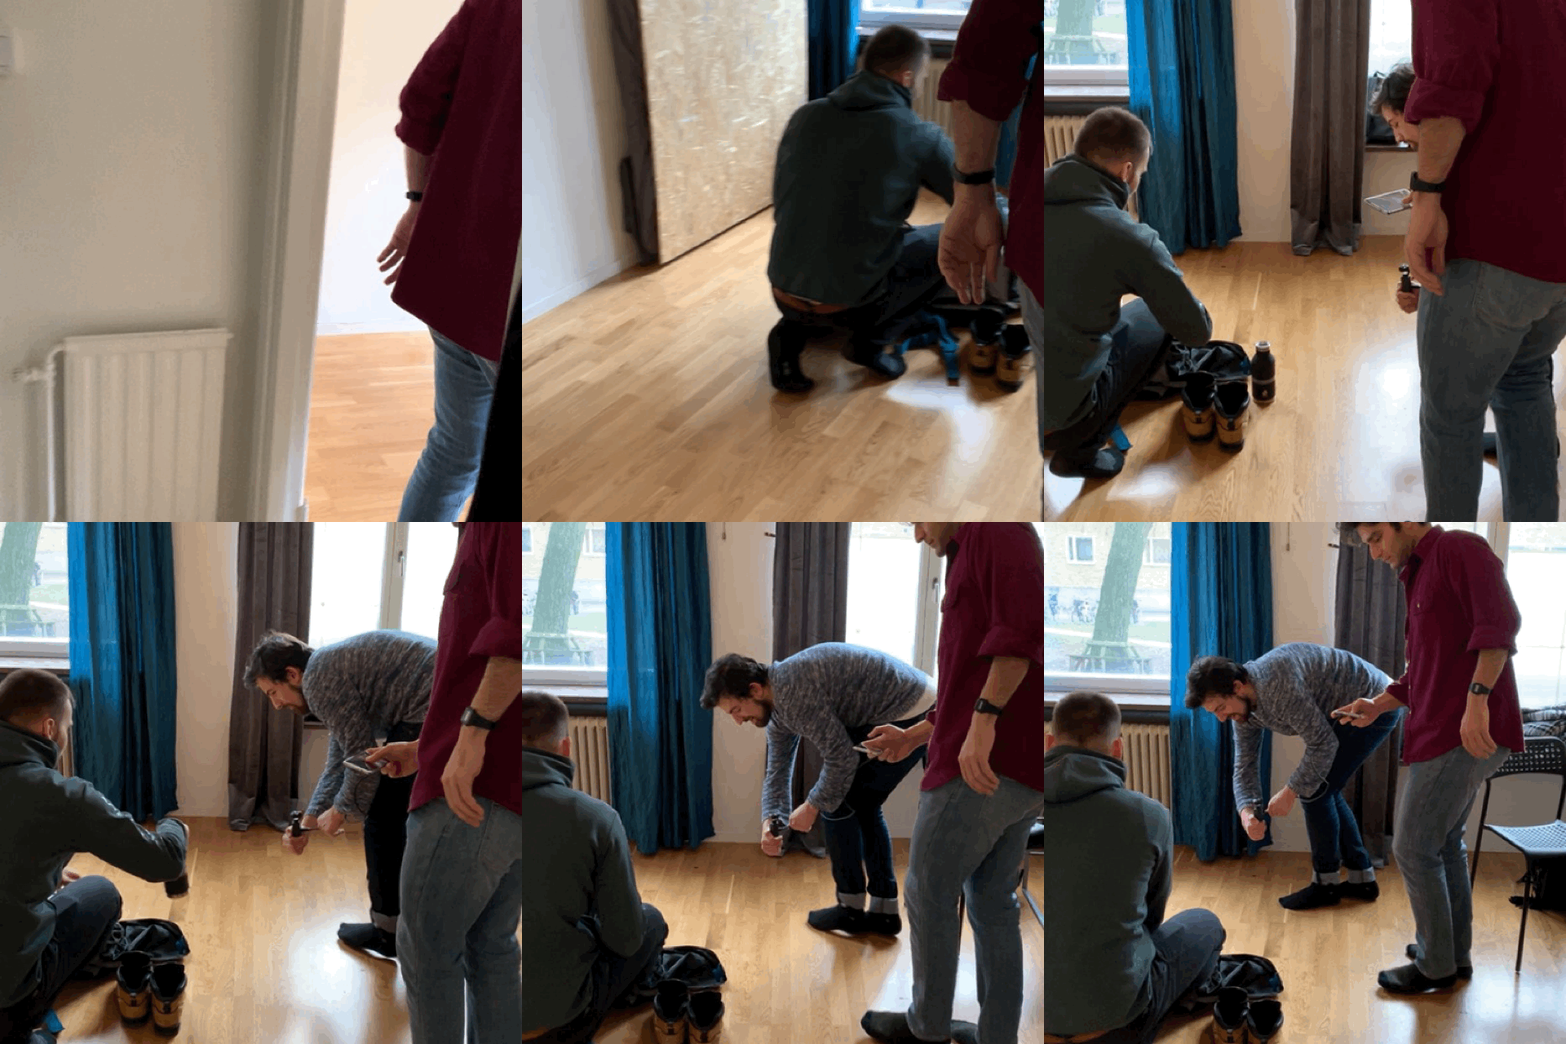
A glimpse of our filming process

Lo-fi video prototyping- Netflix edition

This is a quick and short exercise that underwent during the video-prototyping workshop. The brief is to explore free space gestures for controlling Netflix’s functions. We must capture hand and body movements in conjunction with Netflix’s functions in the video. These functions include playing/pausing, skipping an episode, increasing and decreasing volume, as well as muting the volume.

I collaborated on this project with fellow classmates Mounika Damera and Louis Than.

We were only given an hour to complete filming, editing, and exporting the video, so there wasn’t much time for planning and drawing a storyboard. We immediately got to work after forming the idea of including just a hand making hand-gestures and another person actually controlling the computer- a sneaky but handy technique of Wizard-of-Ozzing.

A smart method we did that prevented chaos and delay in the editing process was to delete footage that failed that we weren’t going to use in the actual video immediately after filming. This sped up our process significantly. After compiling all the footage, putting them in order, cropping out any sections from the footages that had accidental dialogue by the team members, and adding an introduction and ending image, voilà, our video was complete, watch it below.

This quick yet straight-foward exercise that quickly introduced us to the concept of lo-fi video prototyping. In addition to the laptop, all we used were hand gestures, and we were able to quickly convey the purpose of the video– free space Netflix using gestures. A more extensive video prototyping exercise will follow along.

Team-building

A team is “a small group of people with complementary skills, committed to common performance goals, and mutually accountable” according to Johannes’ slide. A group of learners with a common assignment is NOT necessarily a team, it’s much more than that. This journal entry aims to explore the importance of team-building and why it is crucial during a design process or in ANY other context that involves teams.

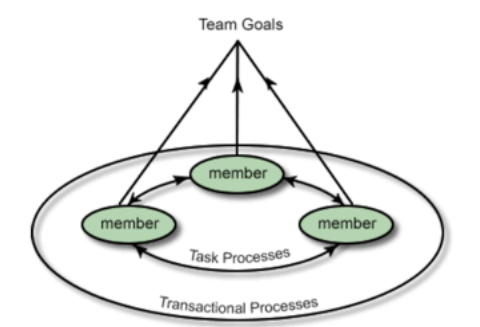
There is generally a similar pattern when a team or group processes a task. They comes in three rings, one including the other. The inner circle would be task processes, then the transactional processes, then the outer-most ring would be the non goal-oriented social interactions. All of these build upon each other to build the team into reaching their goals. Forming groups, we had to discuss the relationship between the second and the third circle, and how these contribute to the efficiency of task processes.

We concluded that the task process are actions to reach the goal, transactional processes include every meeting, every e-mail, and every information share, and the non-goal-oriented interactions include everything else, such as socializing in a informal setting. These are all important group dynamics that build upon each other, if a team does not commit to non-goal-oriented interactions, the team might be stiffer with one another and the end-goal might be harder to reach. On the other hand, if a team pays too much attention on informal interactions, that wouldn’t be an efficient team either due to lack of focus towards the goal. There must be a balance within the three rings for a more successful outcome.

What are group dynamics? Group dynamics are unspoken communications in group discussions. They’re non-verbal, including expressions, movements, tone of voice, selection of words. Members are generally not aware of these communications and they’re usually more genuine than verbal communications. Group dynamics play a significant role within any organization, and the important thing to remember with these structures is that they’re made up of people with different ideas, motivations, background, and sometimes even different agendas. Important aspects of a group that works well together is how individuals interact with each other and how individuals react with the group. Positive relationships are important in a group, and understanding them is equally as important. In order to develop good group dynamics, we must first develop good relationships.

In any platform you can find about team building, you can generally find six important steps to building a successful team :

  1. Focus on roles.
  2. Value each role.
  3. Communicate.
  4. Set goals.
  5. Celebrate successes and failures.
  6. Know each other.

Many argue that communication is the most important aspect of successful team-building. Teams that communicate complete projects in a quicker and more efficient amount of time than others. They also are more accurate in their work than others. Effective communication also allows team members to understand their roles and the roles of everyone else on the team.

As a designer, learning the importance of developing good group dynamics is essential. A designer could work with a team of other designers with similar skills, but it’s also very likely that they would come across working with people who tend to work with other mediums and master in other skills. For example, designers work with programmers, back-end developers, engineers, and other roles quite often as an innovations team. So it’s important to pay attention to group dynamics when members have complementary skills.

An assignment given by Johannes was to create a group contract and establish ground group rules as an exercise. Here it goes below:

GROUP RULES

In collaboration with Nefeli Alousi, Therese Casio Persson, Monica Posmaesi, and Julija Rukanskaitė

I. Ground rules

1. Attendance

  • How often we meet is dependant of the workload, however the minimum is once a week.
  • We could meet one of the days when we don’t have any lectures or before/after a lecture.
  • And the time we spend is between 30 min – 3 hours.
  • Planning together and concluding after each meeting.
  • If necessary, appoint a chairperson
  • Everyone communicates about their upcoming absence or as soon as possible, using a group communication tool. The reasons for absence should be discussed. Absence is acceptable in regular meetings but not in oficial group presentations / examinations.

2. Tardiness

  • We have a common goal to be on time. In this way we respect each other’s time.

3. Enforcement

  • If anyone breaks the group contract, that person buys one round of (alcoholic) beverage. (haha)
  • The person does a thorough explanation to why they have broken the group contract.
  • He or she will be forgiven if they have brought something edible. (haha)

4. Information Management

  • One person should be in charge of taking notes for every meeting and depending on the kind of information, either take photos and share with the group through drive or post the notes in a shared document.

5. Agenda Building and expectations

  • To get everyone involved
  • Equal work/involvement/contributions
  • To pass the course
  • That everyone can express their feelings thoughts
  • That everyone feels good
  • To have a common goal
  • Divide the writing equally and do the presentations together
  • Write together in google docs, preferably in the same room or through skype

6. Confidentiality

  • As long as all group members have agreed in sharing information about our work, all actions shall remain between the members.

II. Developing a Productive Team

A healthy team is built on trust and respect of every team member.  Every team member should always be considerate of the different group members individual personality types and experiences of working in a group. The team should always strive towards optimizing the group work by being aware of the members strengths and weaknesses. The team should always have the projects best interests in mind and not let personal issues interfere. The team should also find a way of communicating which is comfortable for every member.   

III. Decision Making in Teams

Everyone should be informed and participate in decision making.

Types of decisions:

  • Low involvement: could be made just by members that are present;
  • Medium involvement: should be made by consulting every member;
  • High involvement: should be made by reaching mutual consensus.


Funky bookcase

This is a follow-up of the Arduino-Processing timer project. To read more about the process leading up to this project, including the introduction of Processing and how Processing and Arduino communicate, read here.

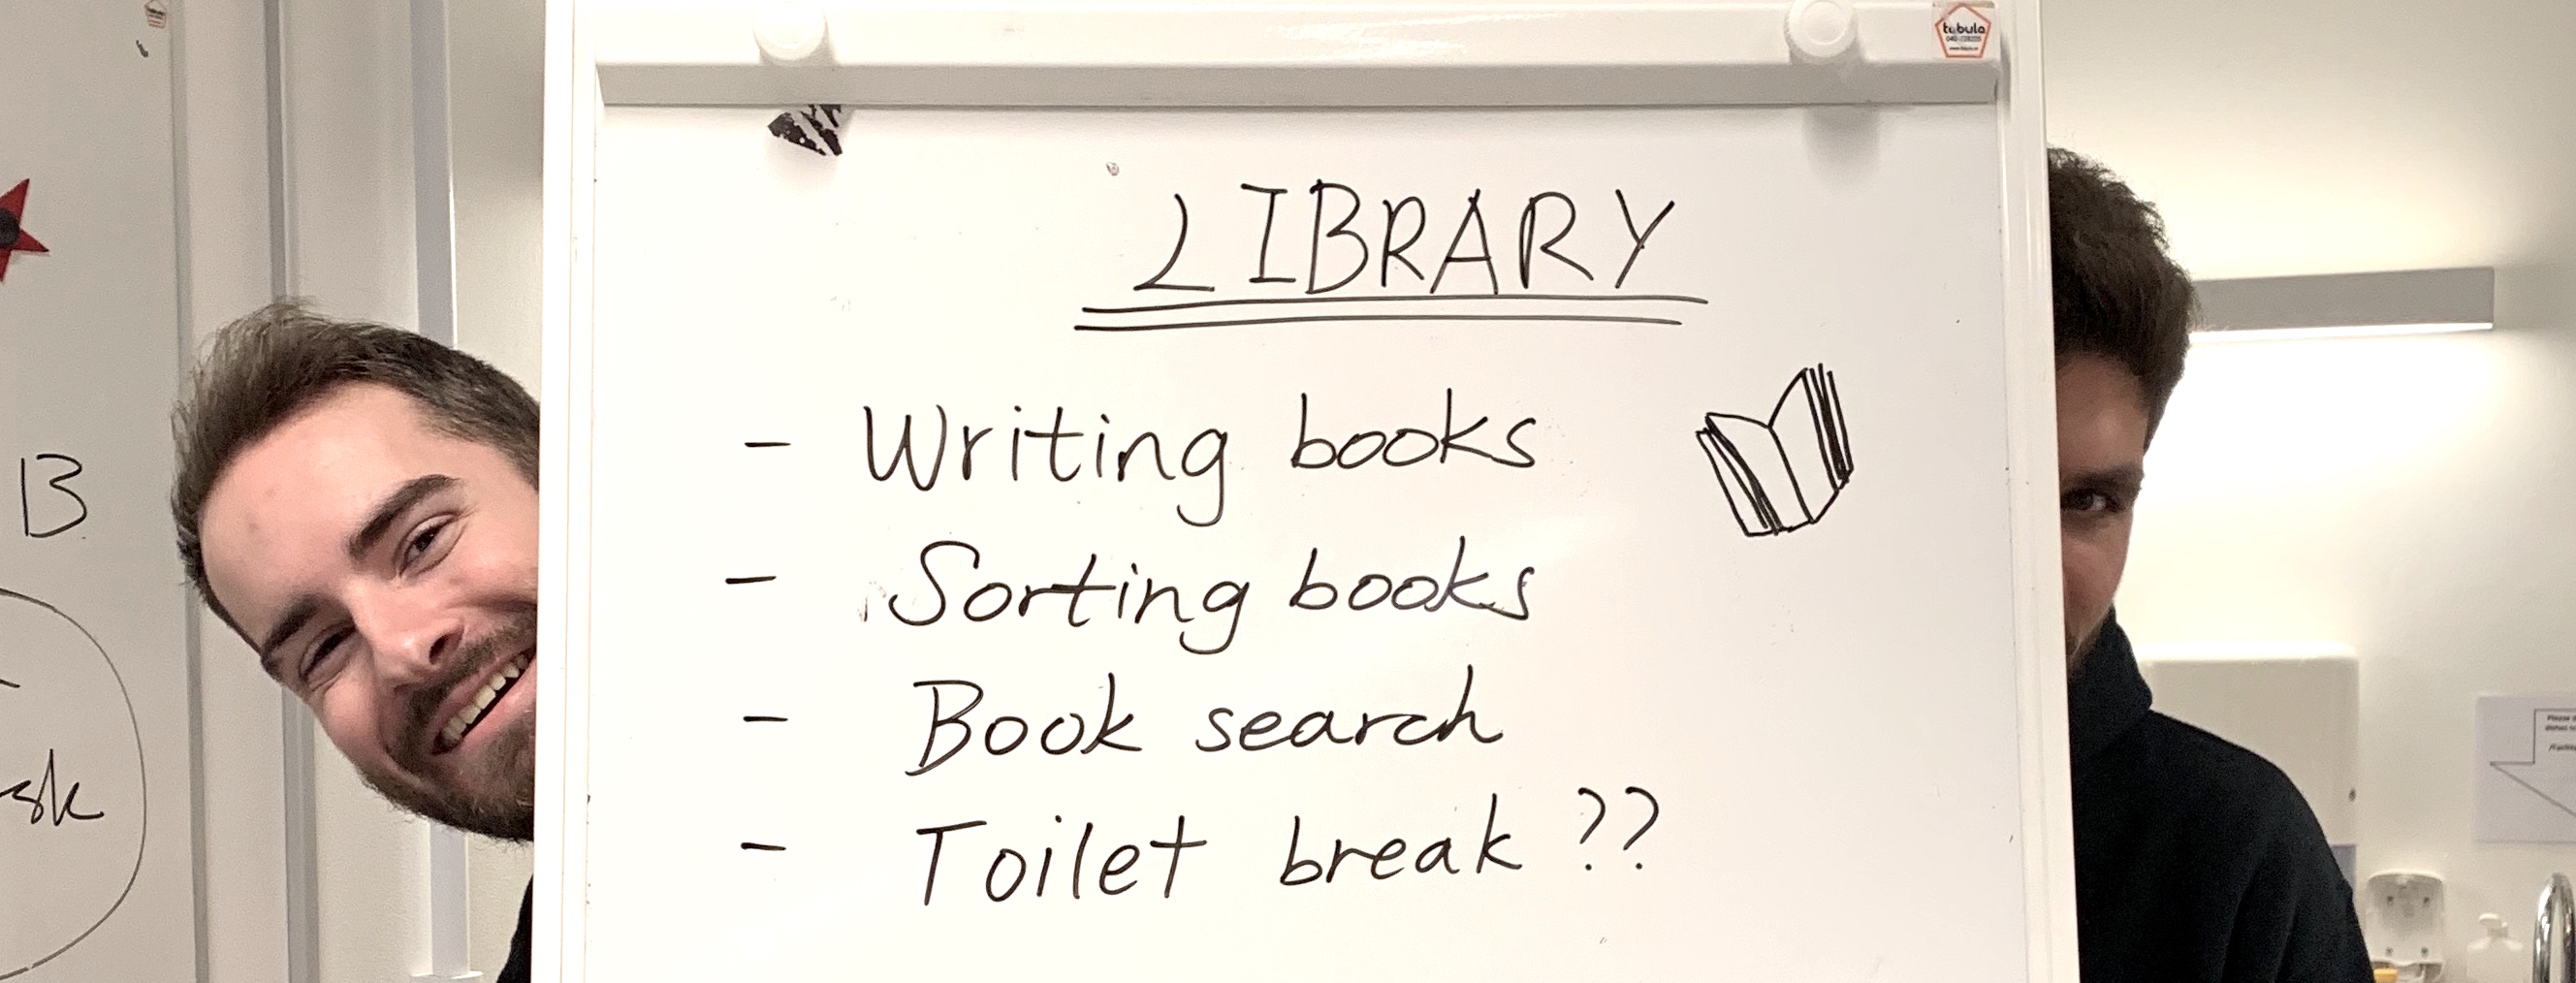
The project took place during the latter part of class after the introduction to the communication between Arduino and the Processing software. The brief states to a game/any interactive artifact set in a specific context that utilizes some sort of a timer, the timer is a requirement and is to be created using Processing. We are to also combine all our knowledge learned from earlier today using the Arduino together with Processing to create something fun and interactive. We must form groups of 2-4 and the minimum requirement of each group is to have at least one student from the Product Design class (if this wasn’t stated before, year-two Product design students are also taking a similar course about interactivity hence why we do Arduino workshops together). The Product Design students each draw a context from a bunch of contexts David has written down, and Interaction Design students are to form groups with those, therefore, one group will have one context to work with and so on. I collaborated with Max from Product Design, and Viktor and Josefine from IDK18. The context we were to work with was… the library.

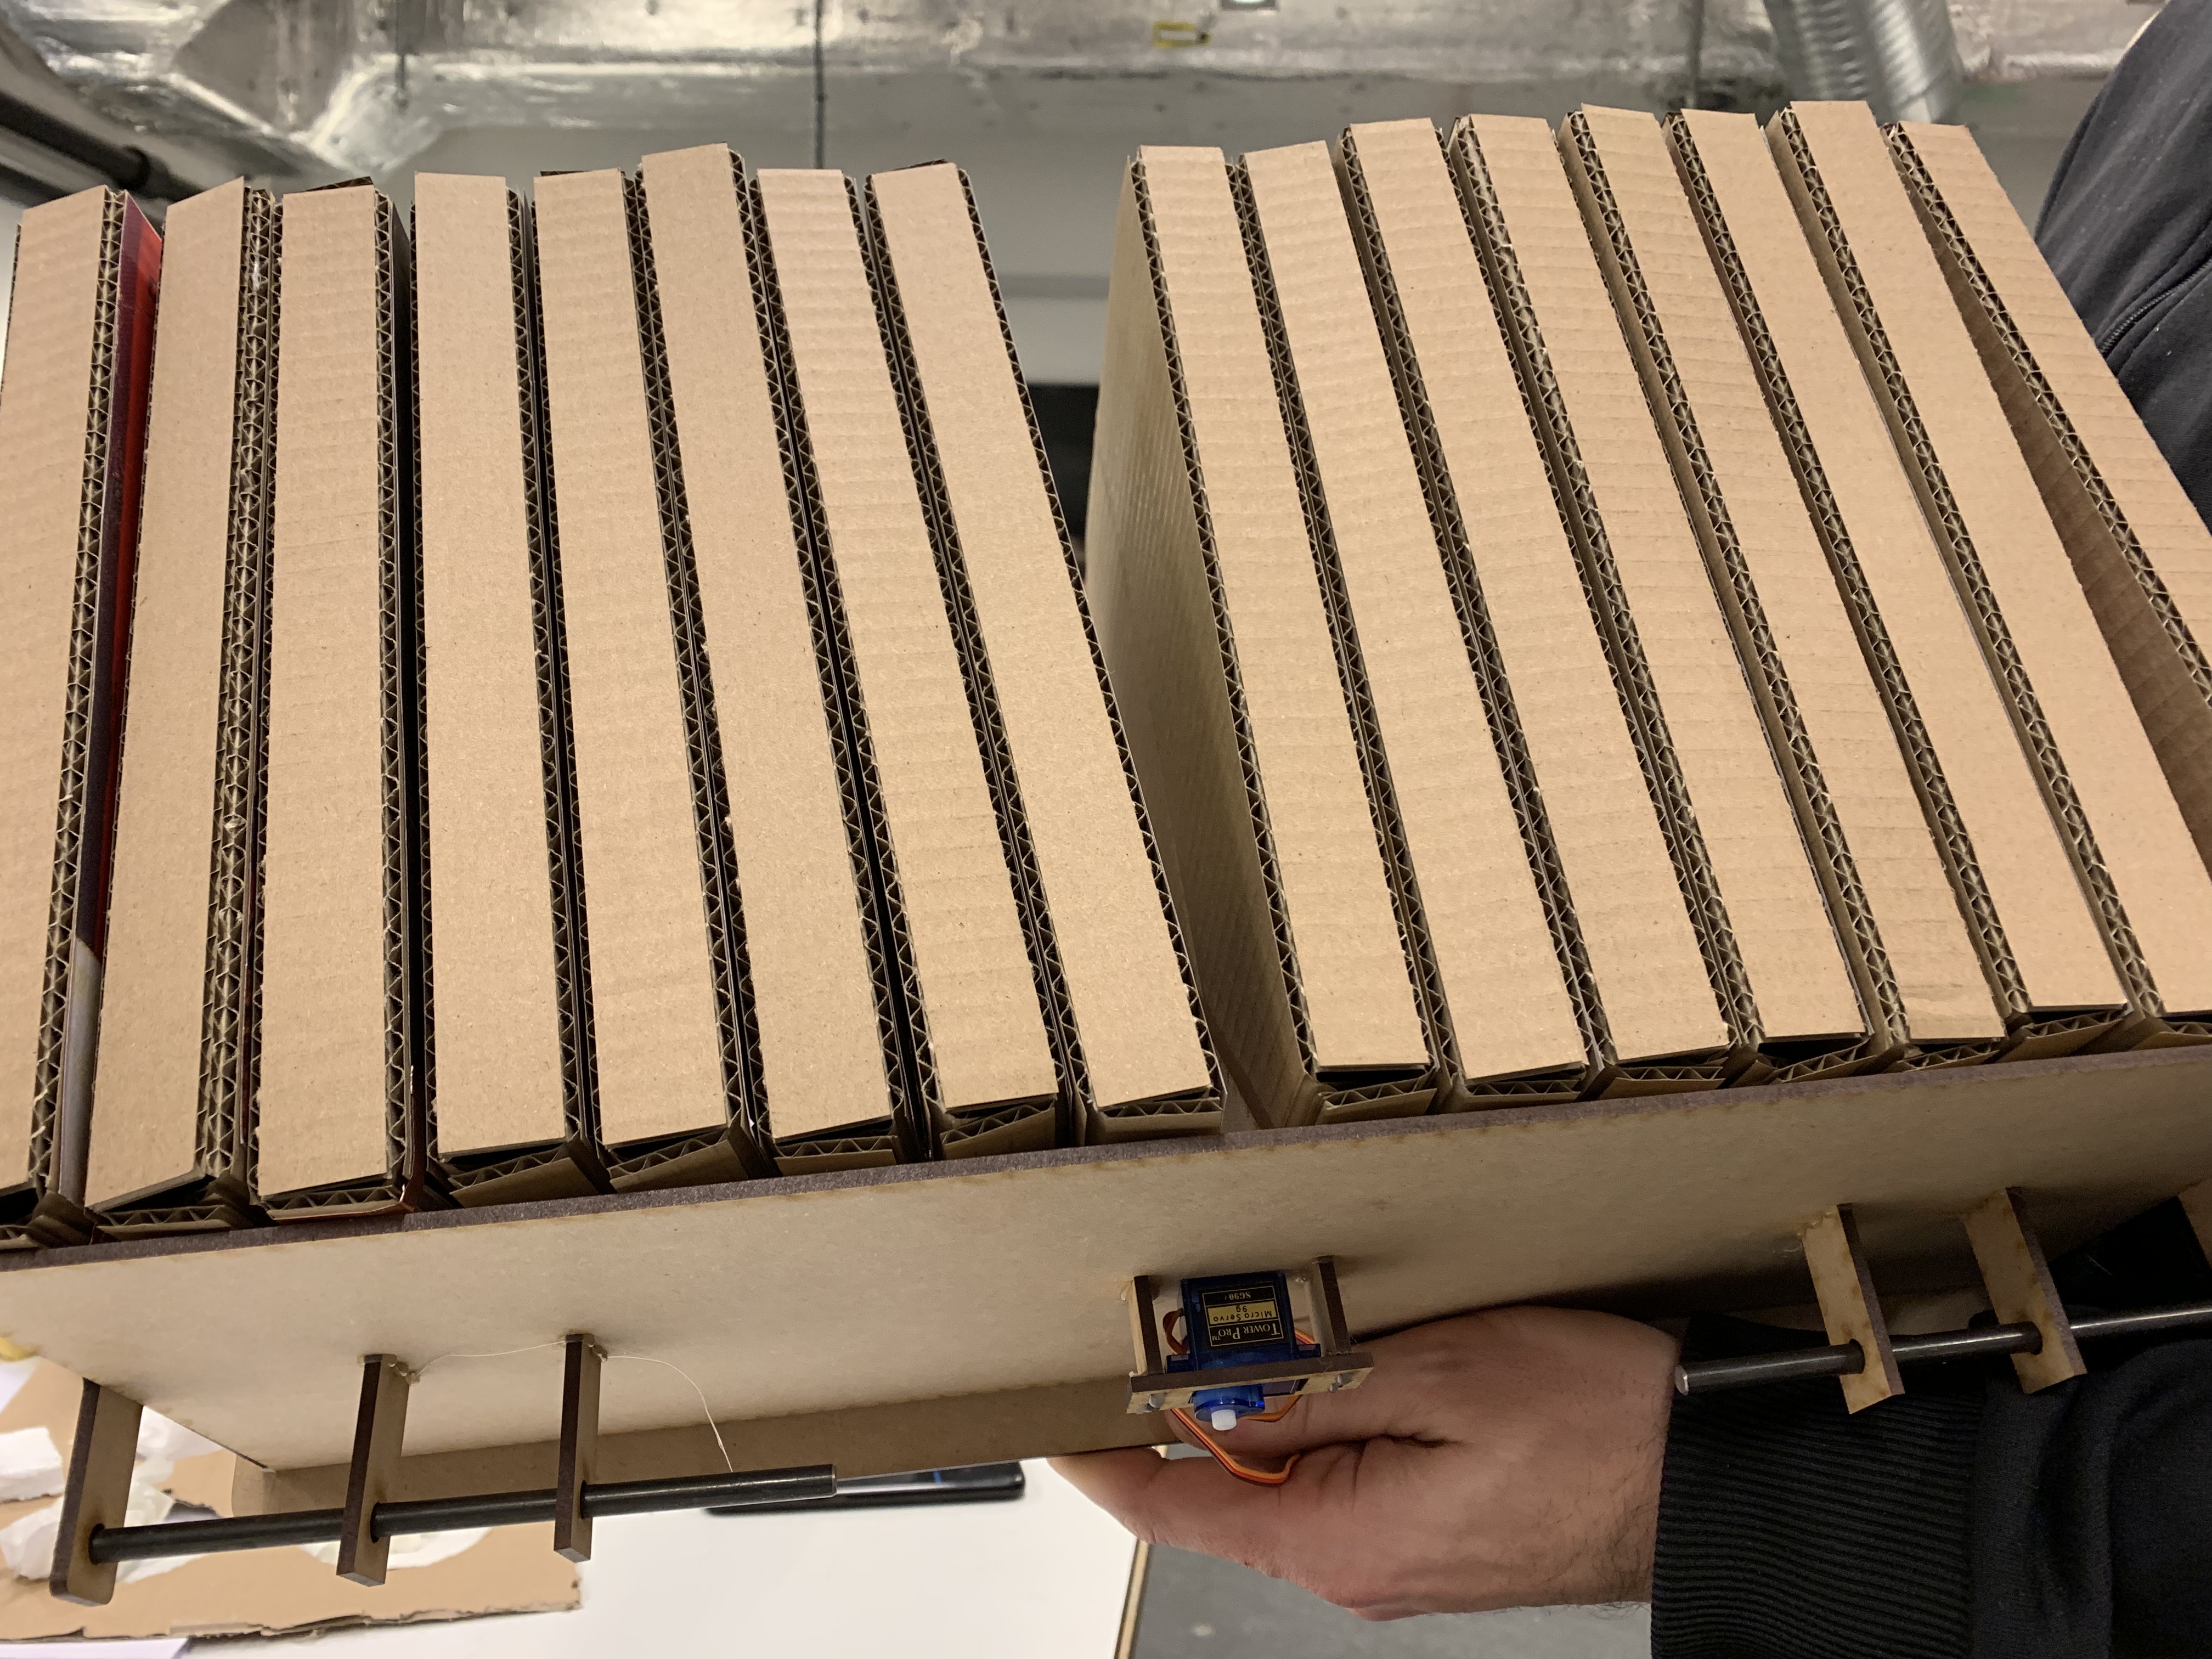
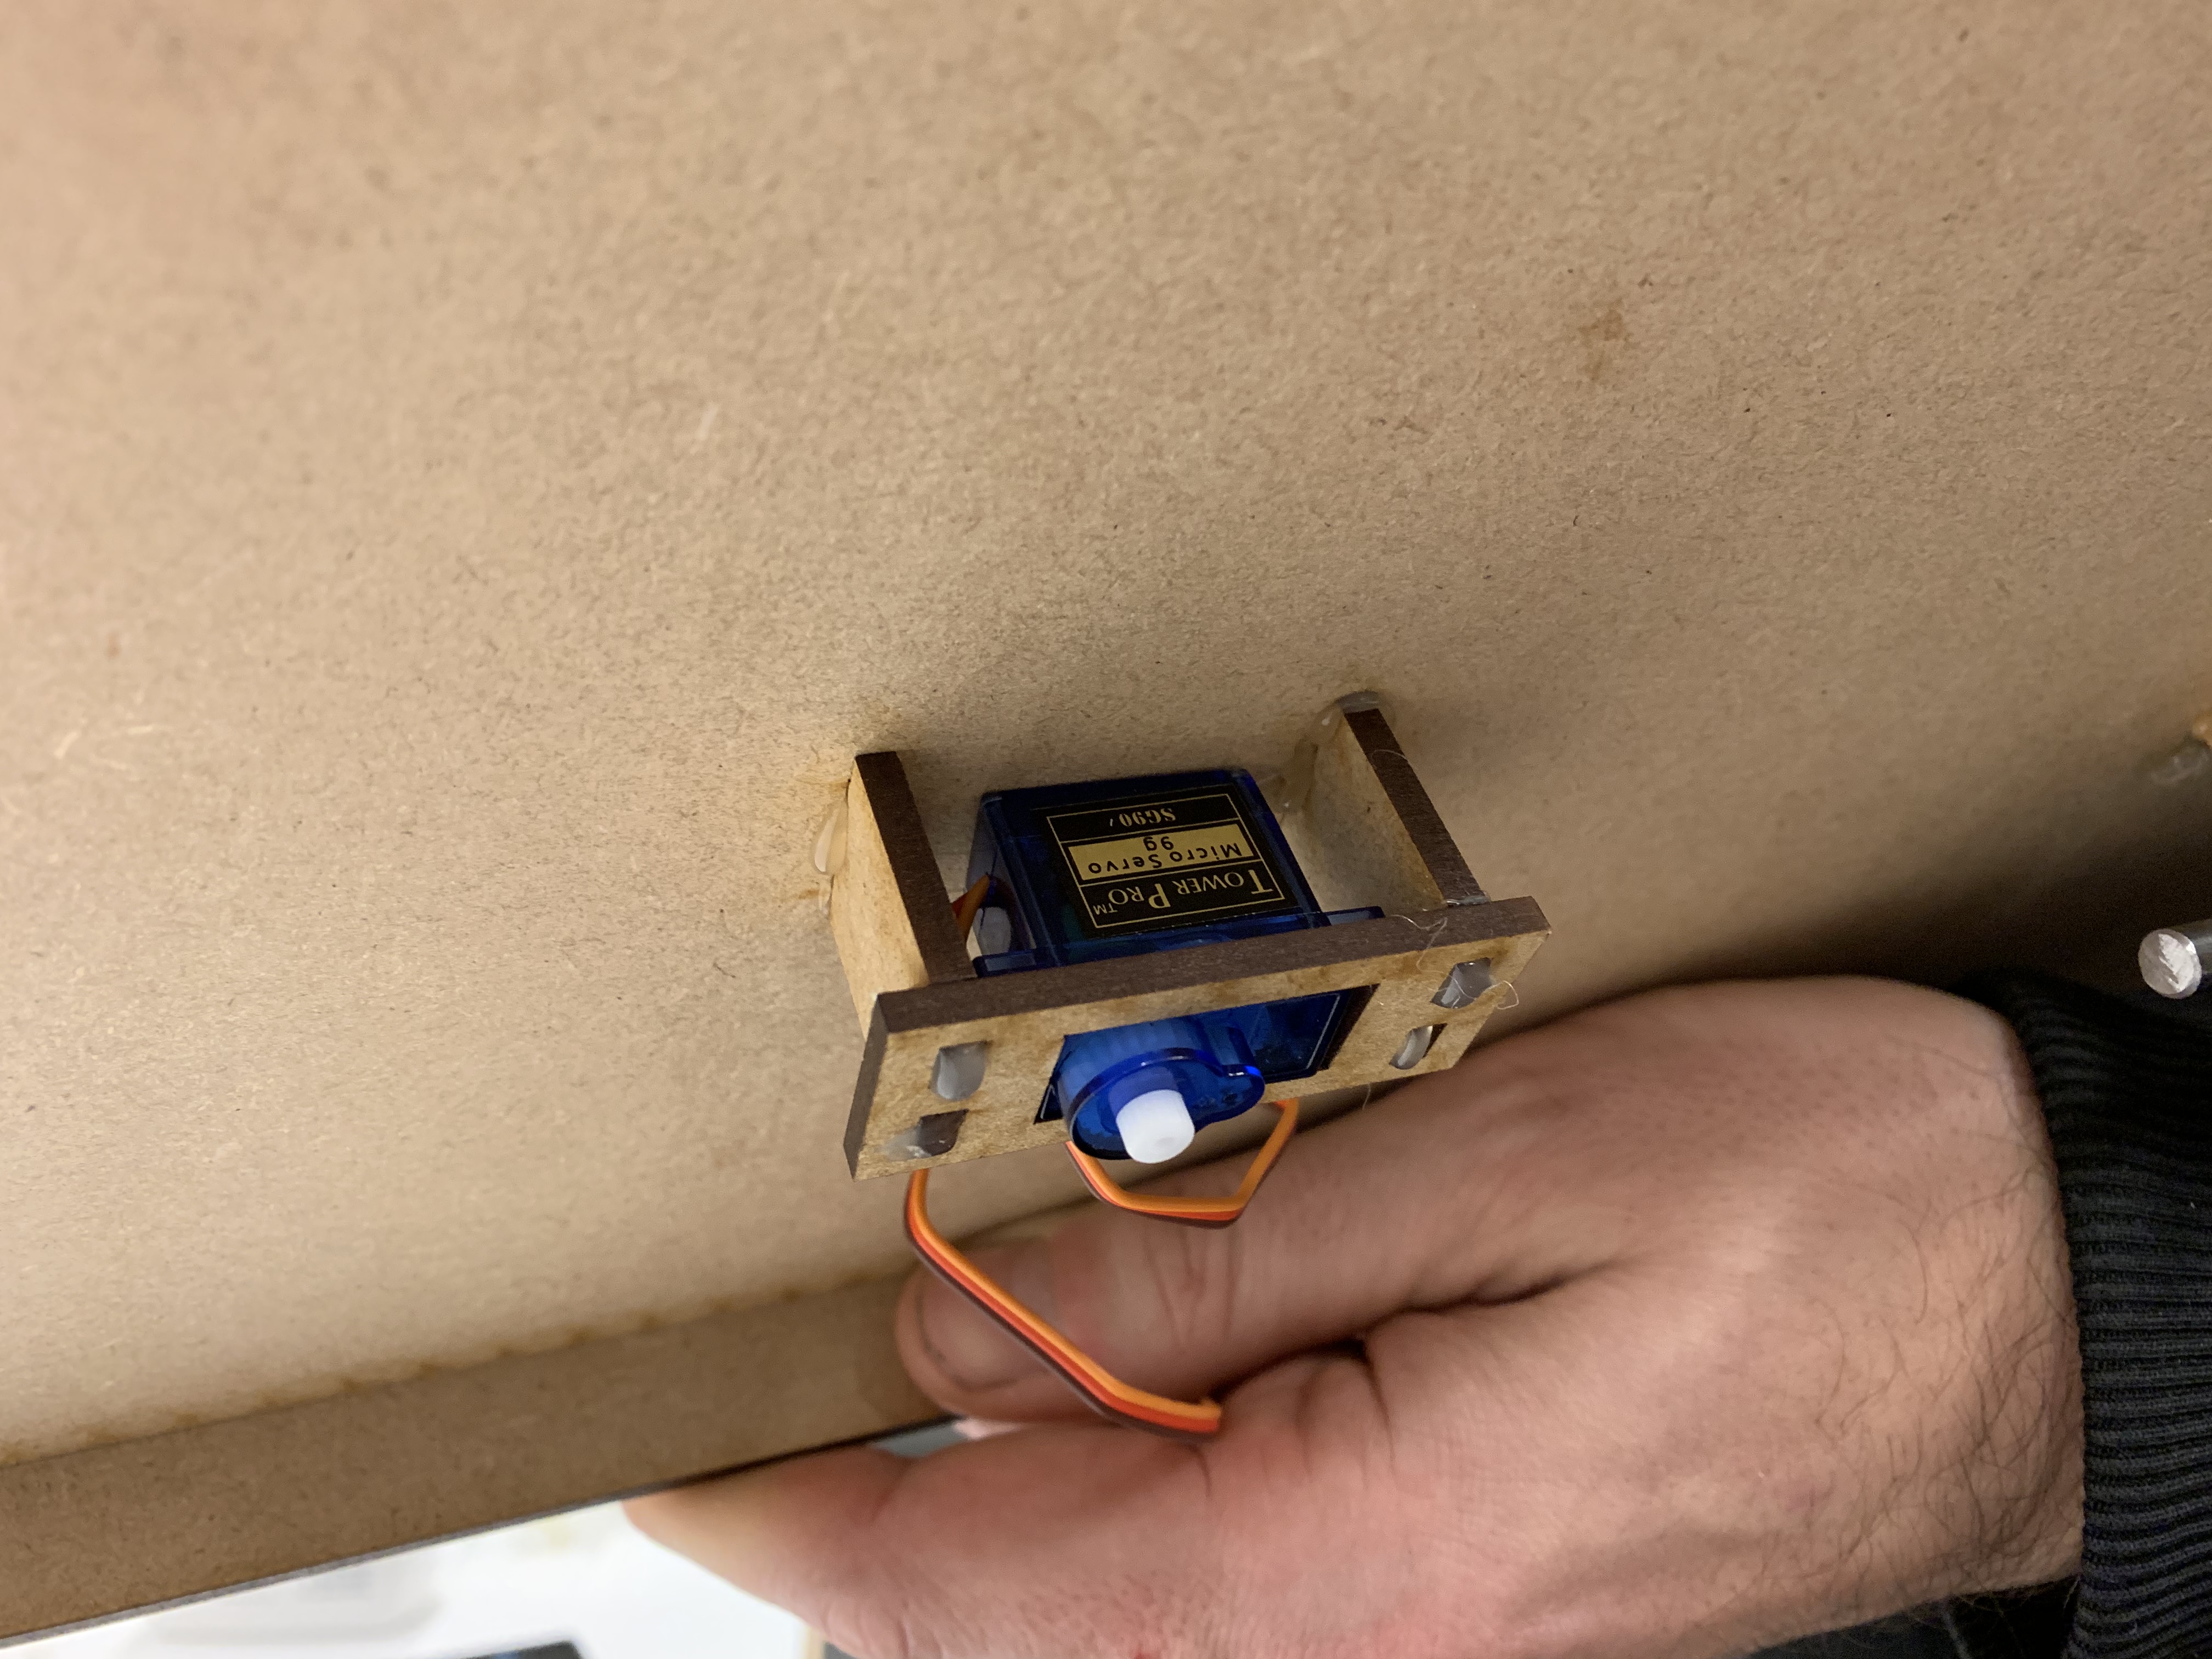
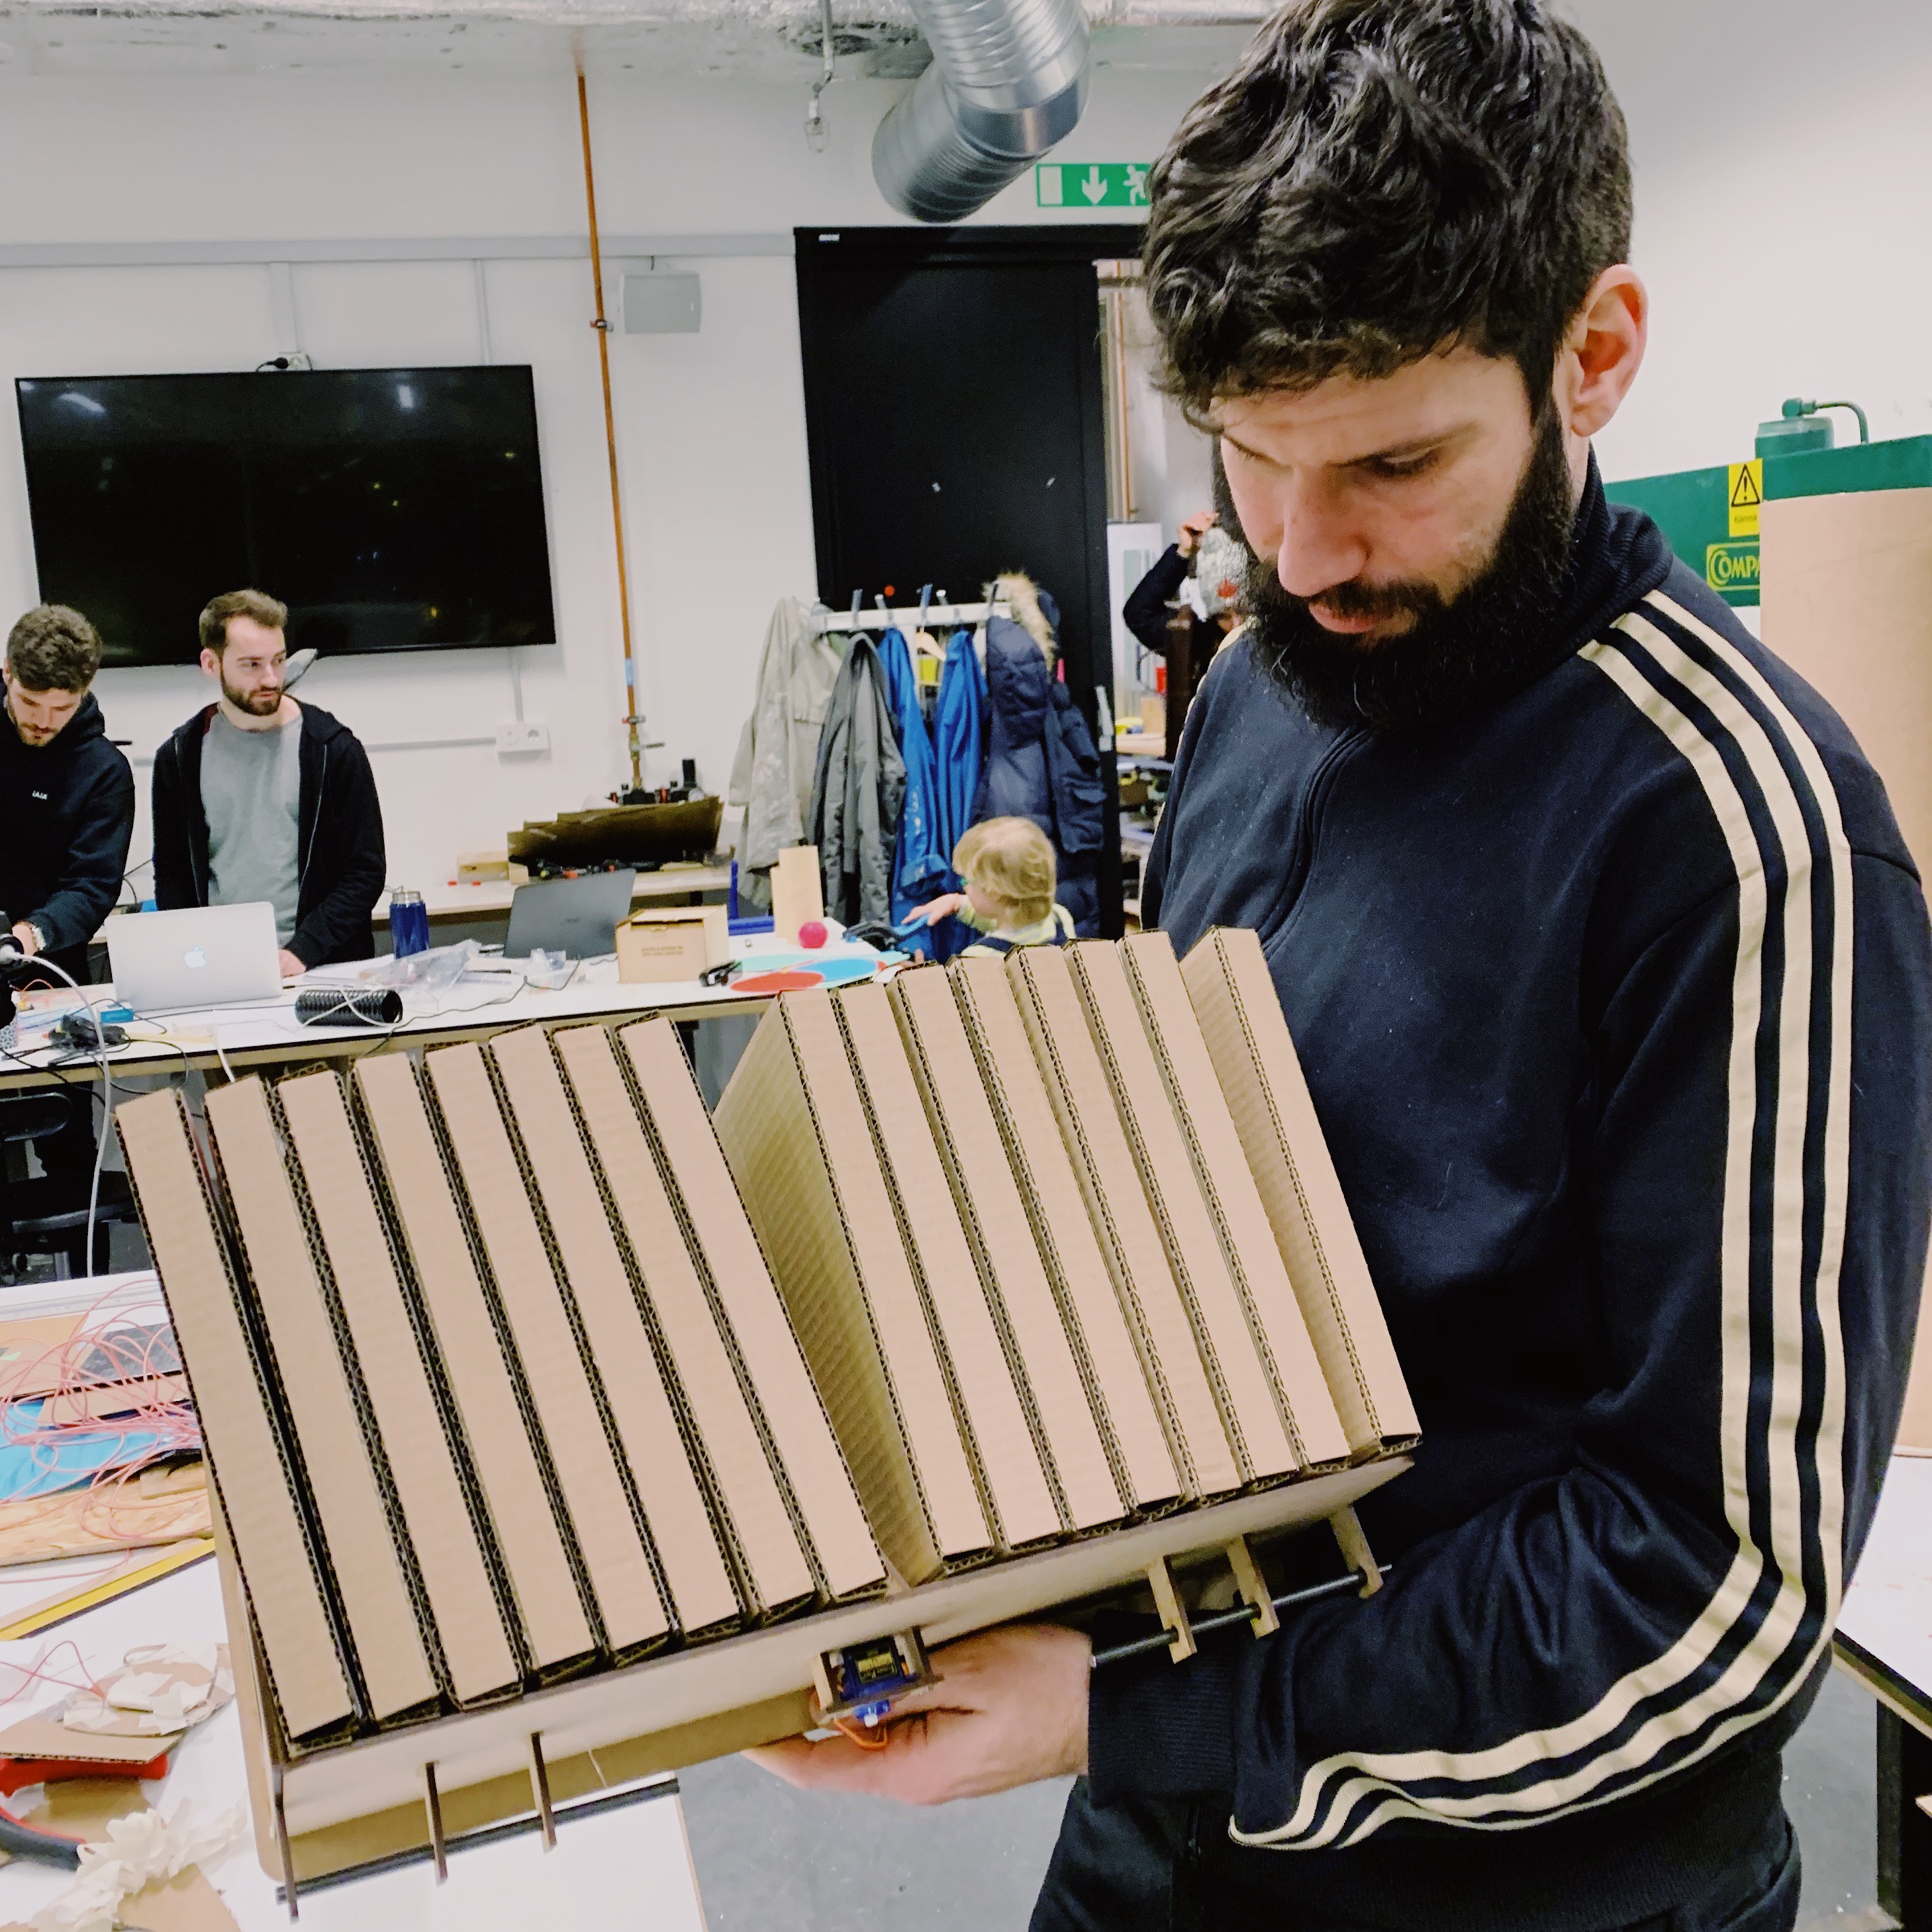
Our group ran into troubles early in the process, struggling to brainstorm and settle on an idea on how to make use of the context to create an interactive artifact. After closer attention and some sketch-prototyping, we settled on a bookcase idea. The bookcase would make use of a servo from the Arduino starter-kit. We plan to make a physical bookcase, create some books that go on it, and also create a system so that when the books are placed in its designated order, you’ve beat the game, if you don’t and the given runs out, the servo is triggered and the book case tilts, causing the books to fall down.

We ran through several challenges along the way, most of it being inefficient time-management and being overly ambitious to begin with. I will address these issues as we go on.

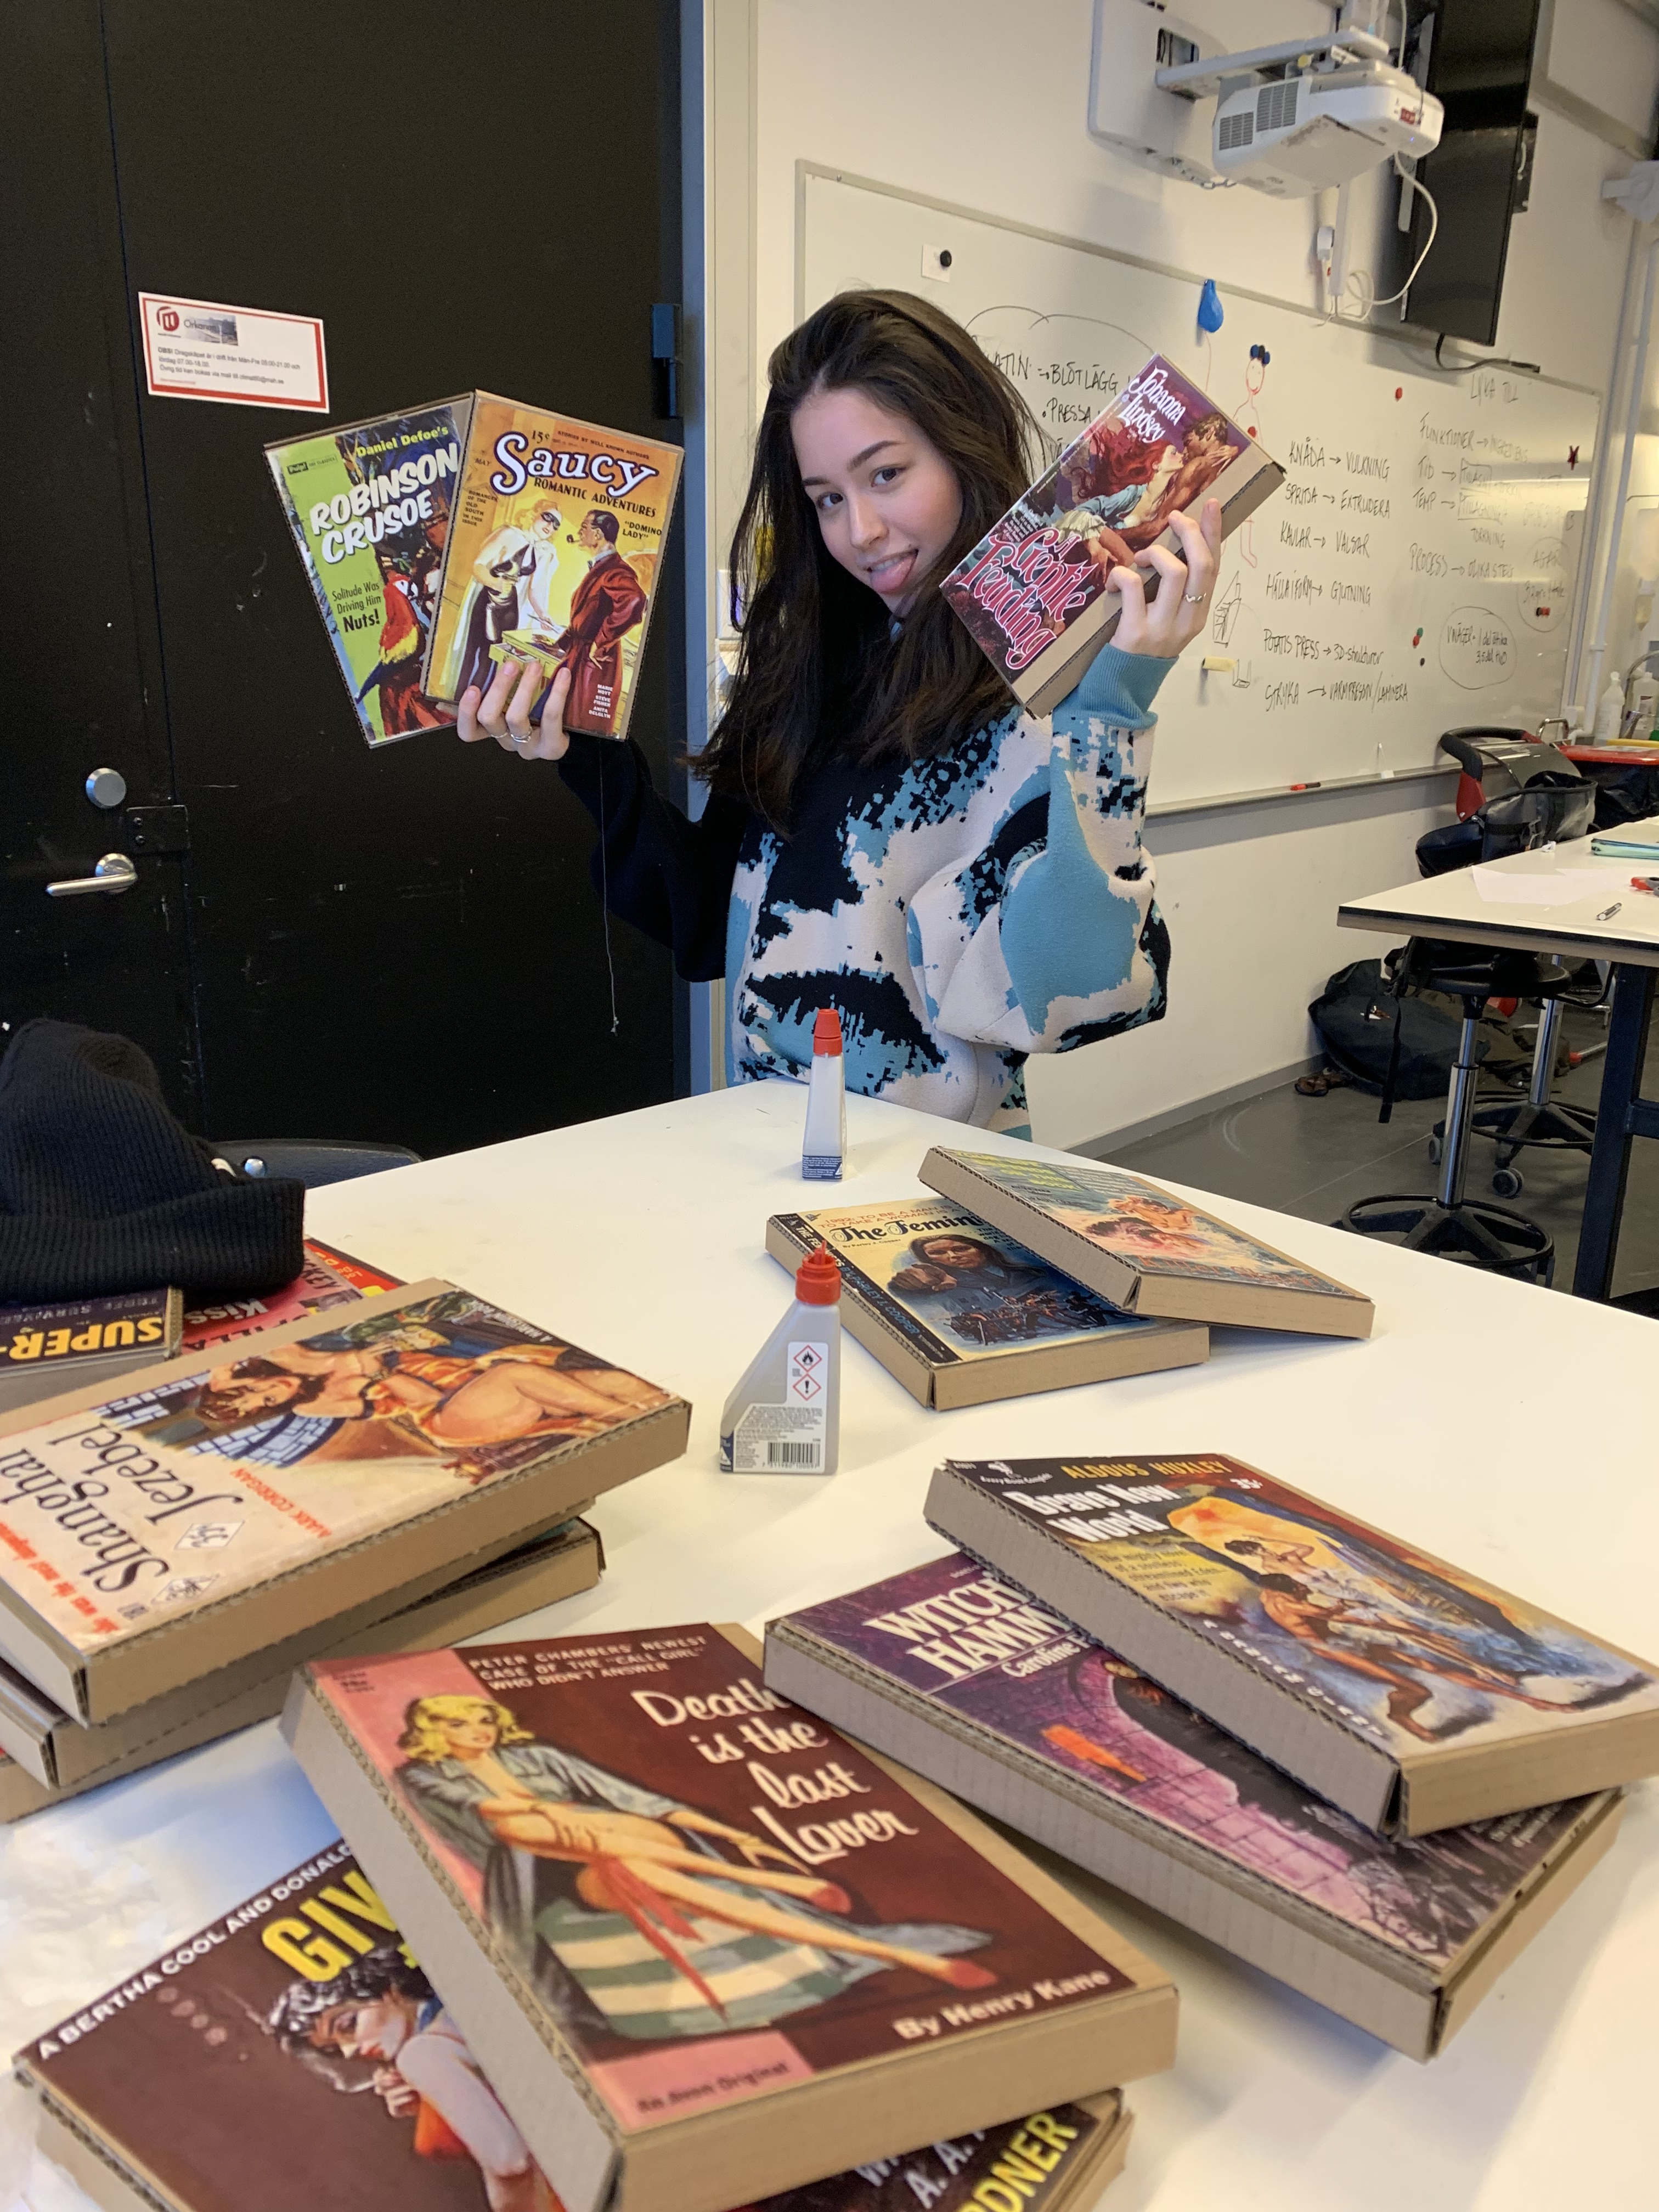
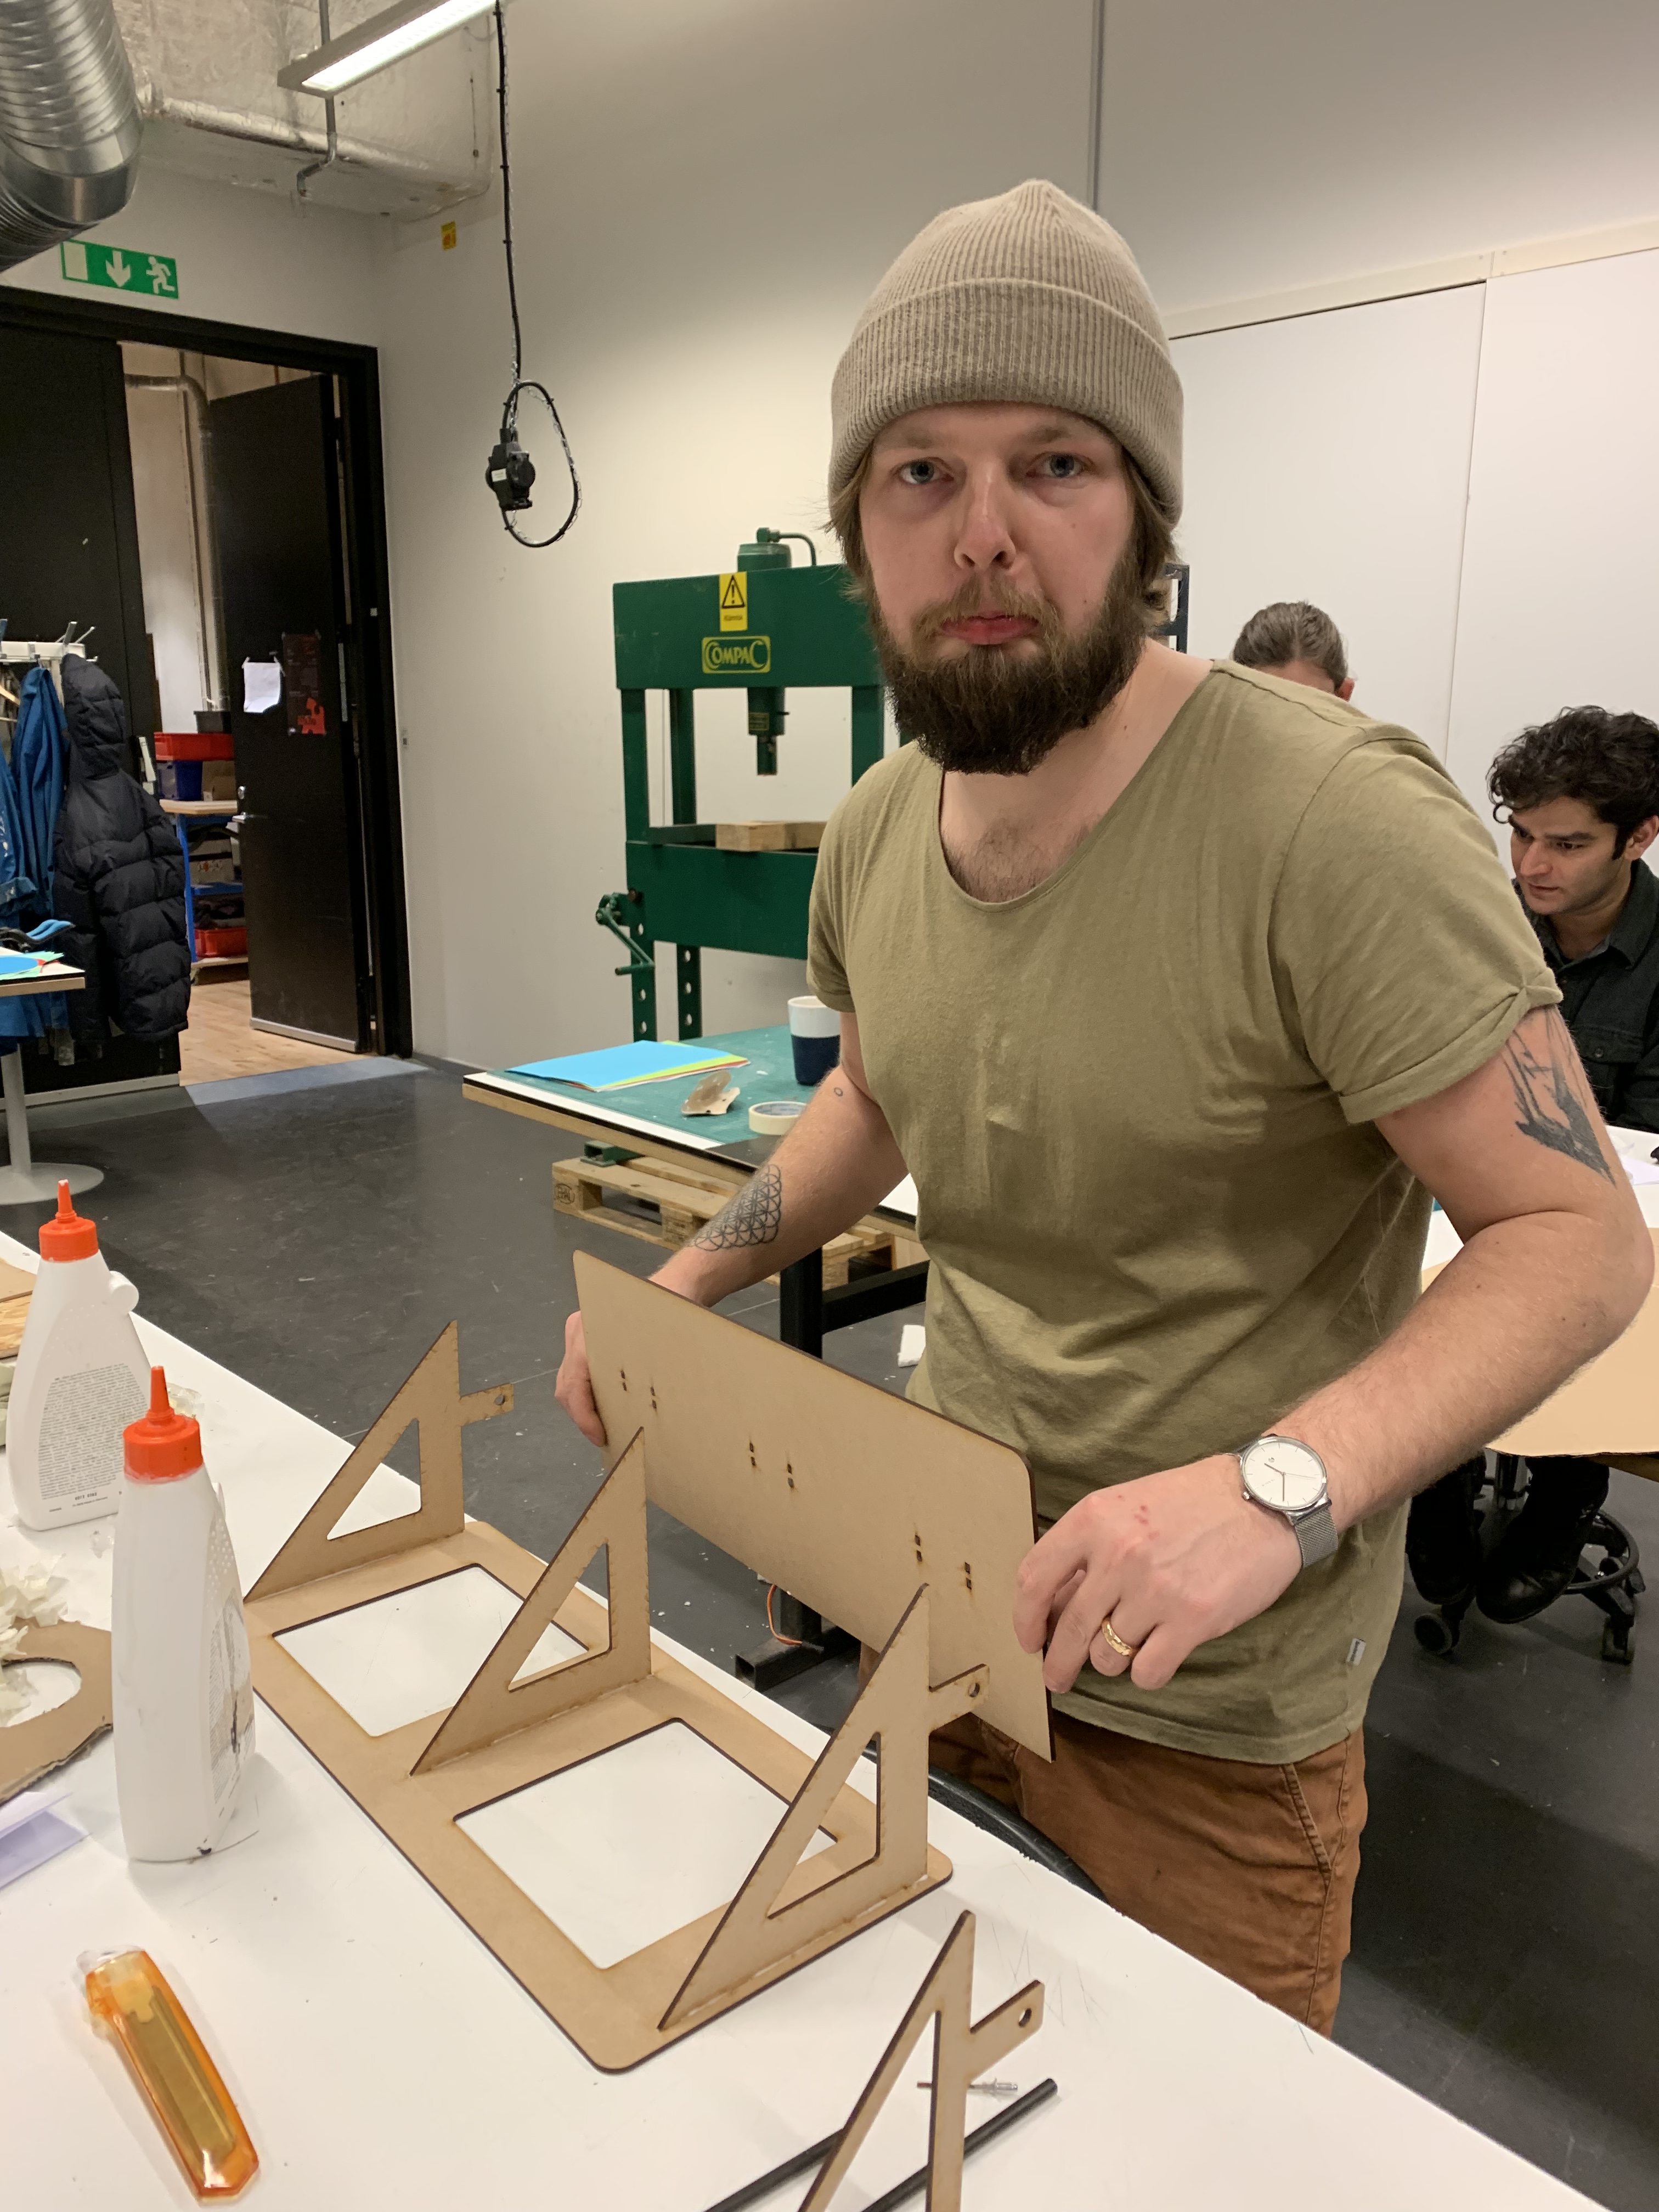
We made use of the laser-cutter in the workshop, and with Max’s extensive knowledge with product design, we put him in charge of the construction of the bookcase structure. He creates parts using Illustrator and cuts them out using laser-cutter. We also used the laser-cutter to cut-out the books, to hopefully speed up the process and shape the books uniformly, the laser printer was acting up a little in the beginning as it didn’t read the Illustrator file-format we provided so that delayed our process a little. Josefine printed out some old vintage book covers, so after we glued the books into the right shape, we pasted the covers and they looked very convincing!

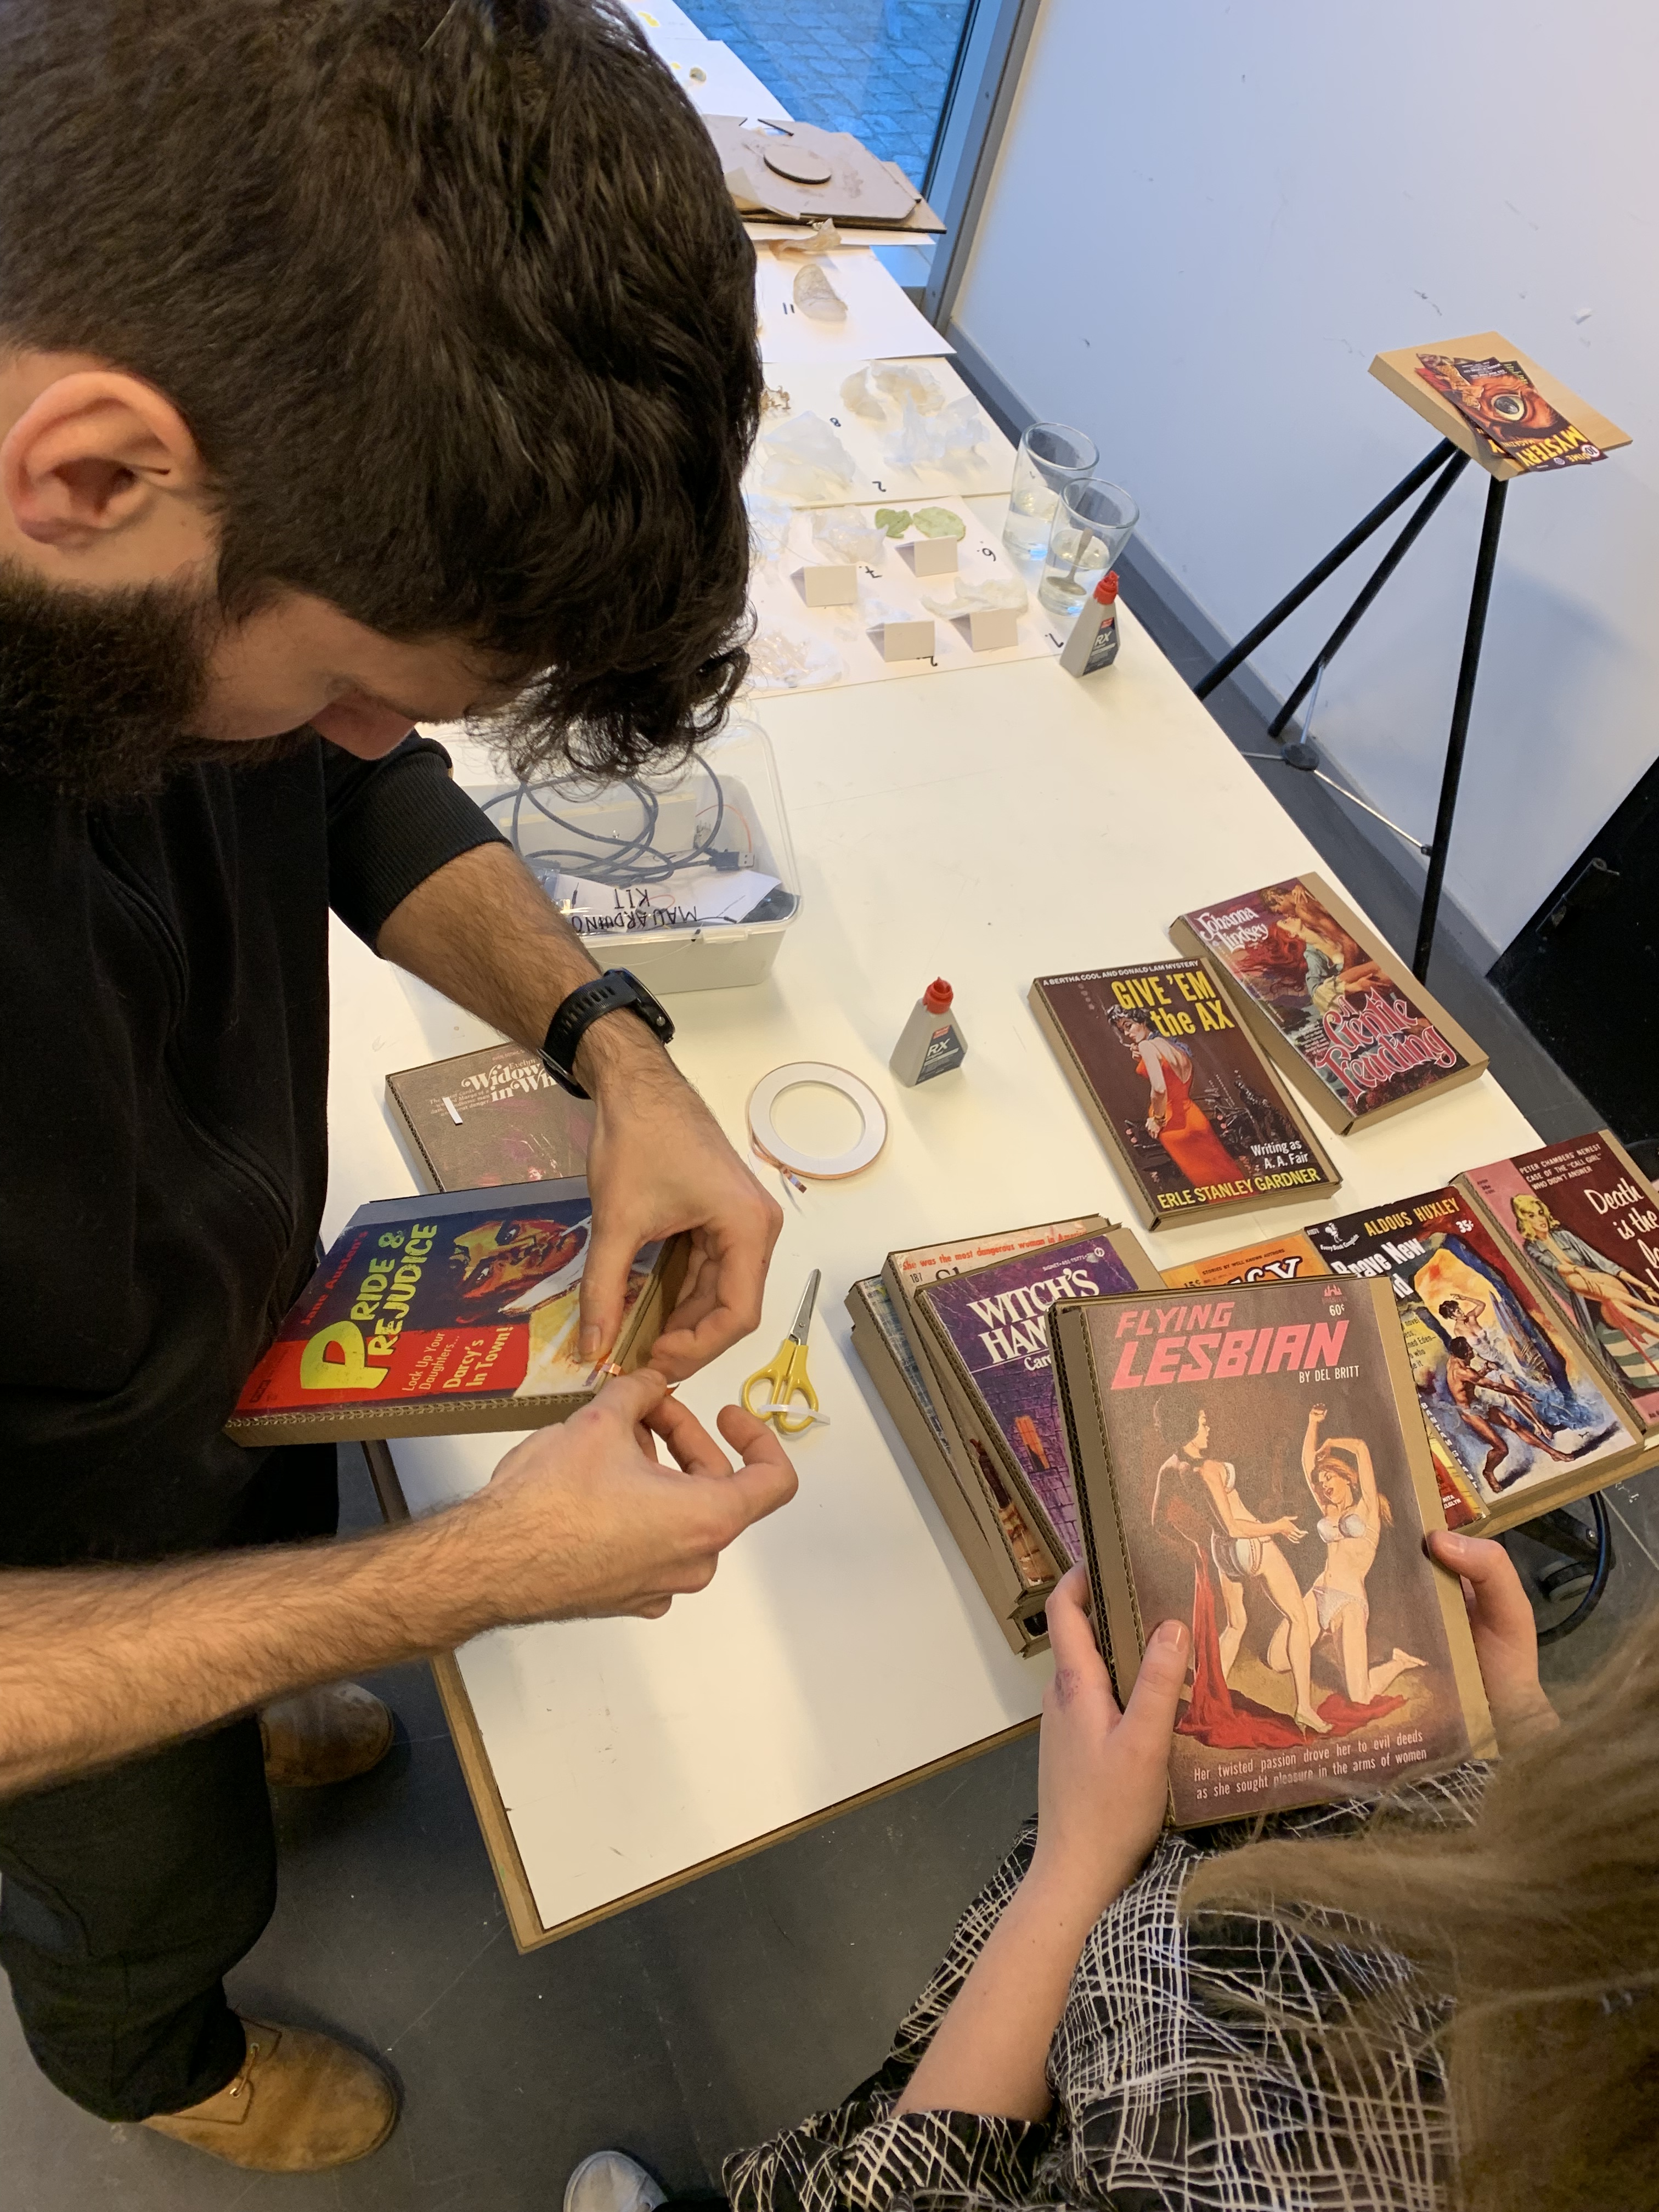
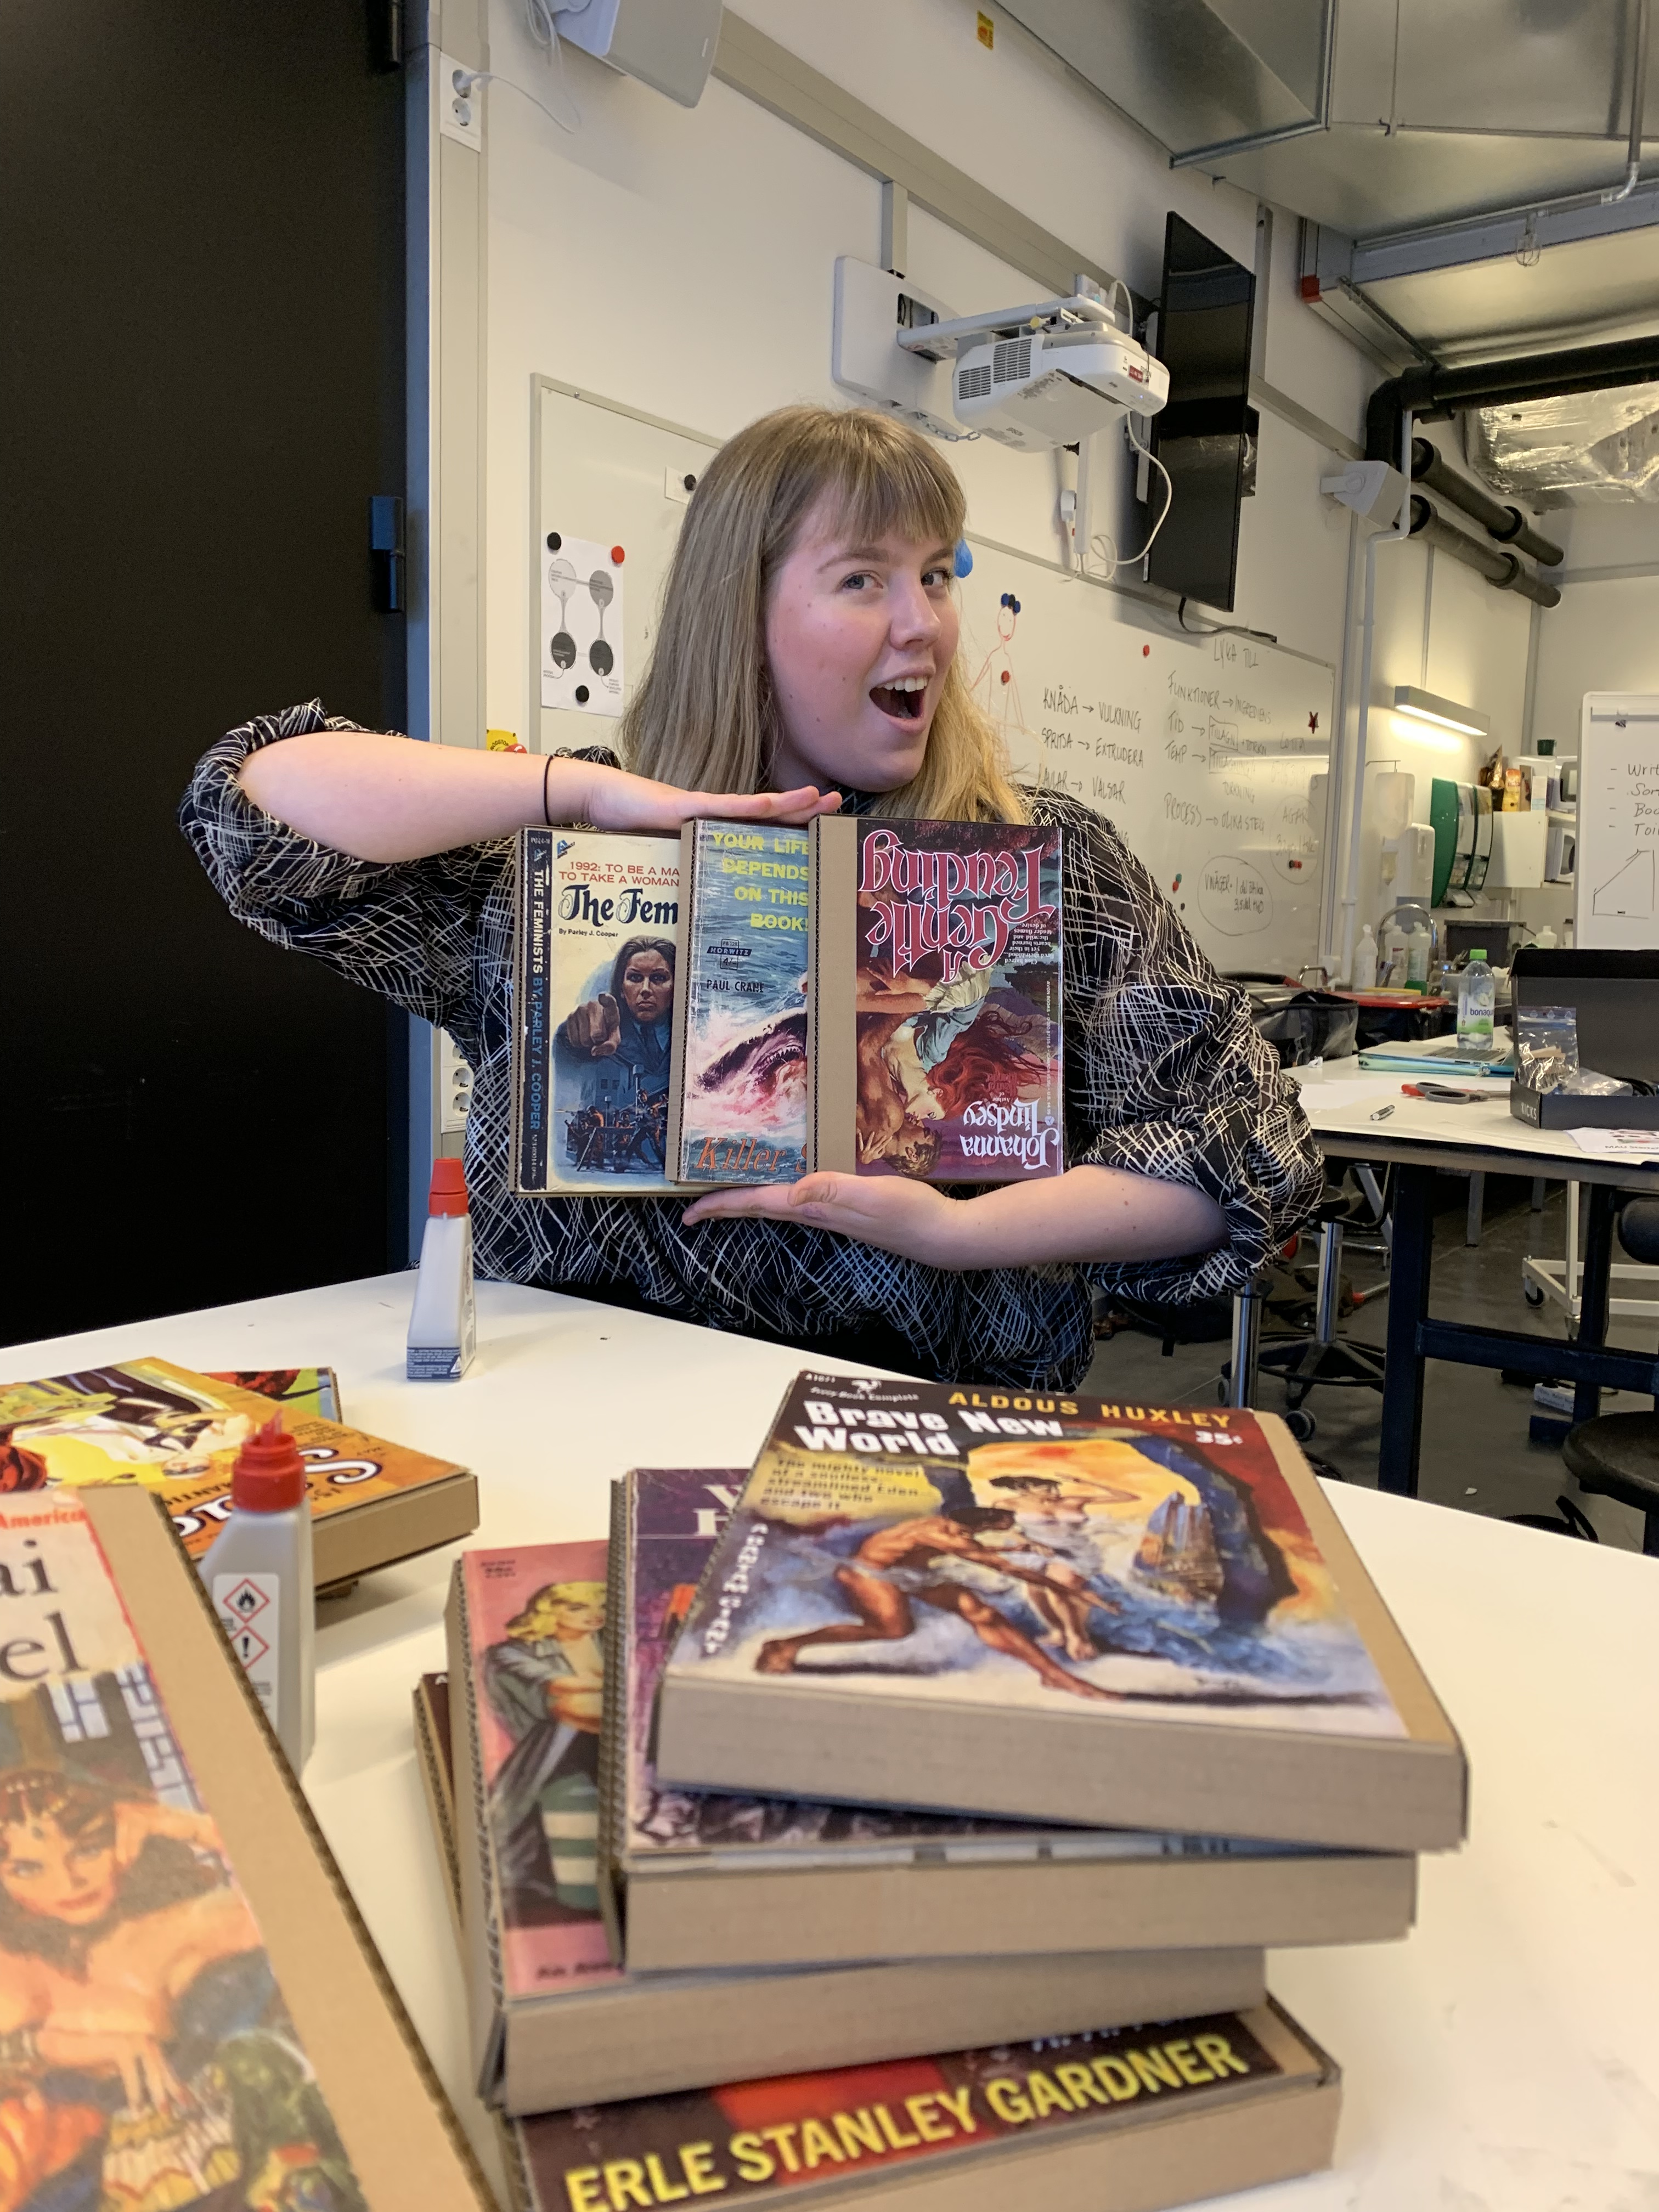
How are we going to make it so that the books only allow one specific order to be the correct one? Our plan is to attach copper tape in specific patterns on the individual books so that the tape would only make contact with the adjacent books. If you don’t place the right book the connection would break and the timer would continue counting down. As you can see, these books to the right would not be in the right order because the tapes are not coming in contact with one another.

Now these are all ideas we wish to execute but was it successful? Unfortunately, it wasn’t. After creating the timer on processing and writing code on the Arduino editor, it was time to see if all 16 of the books, when placed in the correct order (alphabetical order by author’s last name), would establish a connection. We tested this by checking with LED Blink on Arduino. Sadly, it only worked with one or two books, sometimes three, but never more than that. The wires/Arduino (we don’t know which one was the issue) also tend to stop working after a while, forcing us to re-upload the program every other minute. Max was able to built the bookshelf beautifully, but the books just would not work at all, we believe the issue may be that that the books are not placed tightly enough so some of the tapes do not touch, but even when we tried to tighten it, it still didn’t work. Maybe the thinner copper tapes are not as conductive on cardboard, but that’s also not completely certain. All in all, we were not able to conduct our game and our interactive artifact, but at least the execution and the visual appeal was successful.

A Reflection

Why weren’t we able to finish the exercise and present a working artifact? In addition to the technical malfunctions, perhaps we were overly ambitious to start with. We paid a huge amount of attention to the visual appeal of our bookcase but didn’t necessarily brainstorm and test its functionality early enough. We should have keep in mind that it was simply a prototyping project, and in no shape or form needed to be perfect. Don’t get me wrong, the end product was extremely rewarding, but it was a shame that the core functionality of the bookcase was not able to be executed. If we had discovered the issues with the copper tape and Arduino earlier, perhaps we could have taken a step back to work towards something else, however, by the time we finished taping the tapes, the time for us to work with the project was almost up. If we hadn’t paid too much attention to the visuals at all- such as the unnecessary pasting of the covers- and started with the program earlier on, we might have been able to present a functioning bookcase.

This was yet another exercise for cardboard prototyping. Cardboard prototyping, as I’ve mentioned in the QWOP entry, is essential because it’s a common lo-fi method to prototype and test physical objects and environments. It’s cheap and easy and often created to be thrown away. This makes it easier for those who created the prototype to let go, reflect, and embrace the necessary changes. It was nice to explore with this medium again, this time incorporating both Processing and Arduino into the project. What happened to the timer by the way? It worked fine, it’s on Viktor’s laptop so I cannot display it here, but we couldn’t incorporate it at all after the failure of the copper taped books. The bookcase is stored in the workshop so maybe one day we could pick up the project again and make it work.

Some photos

Processing?

A new programming language? why is that necessary?

As soon as David announced that we’d be learning Processing as a new language I fell bummed about having to learn another programming language alongside of all the programming we’re doing already in the programming courses. This journal entry aims to reflect on the two days spent on exploring the Processing software, its language, as well as how it works with the Arduino. I also aim to find the answer to why Processing is important to learn as designers. Below is a video shared by the Processing foundation that introduces the newest version of Processing.

What did we do?

David began by introducing vaguely what Processing does and how its useful. As designers, we use or learn to use Processing as it’s a flexible software sketchbook popularly used as a language of coding in the context of visual arts. According to David, Processing is “used to create animations, simple UIs, games, and proof of concept to many ideas.” Therefore, it’s crucial to learn it as a UX design student. More details on processing and why it’s relevant will be touched upon below.

On day one, David showed us some projects and generative art in which designers, artists, or programmers have created using Processing, they were absolutely stunning and that really showed the program’s capabilities. David guided us through a series of coding examples on Processing, the processing language is a revised version of Java simplified for amateurs in programming. The examples included drawing a line, drawing our own initials, changing characteristics along the way, expressing color, creating graphical primitives such as ellipses, drawing in layers, creating interactive programs, making items move, and so on. Other exercises include making a clock, making a bouncing ball animation, utilizing conditionals, adding images, animating images, etcetera. You can really do a lot with Processing and the graphics it’s capable of generating is endless.

some generative art!
Kazam_screencast_00036.mp4.gif
Example for drawing ellipses!

Day two of Processing consists of a lecture about using Arduino with Processing followed up by a workshop taking up the latter part of the class to create a game/any interactive artifact set in a specific context that utilizes some sort of a timer, the timer is to be created with Processing and with the knowledge combined from using the Arduino with Processing, to create something fun and interactive. This project with the timer will be discussed in another journal entry that can be found here. In addition to it being a programming language for visualization, Processing is also an open source language and development tool for writing programs in other computers. It’s useful when you want those other computers to “talk” with an Arduino, for instance to display or save some data collected by the Arduino (source). David guided us through basic examples of communication between Arduino and Processing. Why is this useful? This comes in handy for when you want to write both Arduino and Processing programs and have them talk to each other, it works best for communicating simple information.

An example of this communication was carried out with an basic example from Arduino. It involves analog reading, serial reading, serial printing and counting. A sensor is attached on the Arduino as an element of interaction. As the counter counts upwards ellipses are drawn via processing, when you place your finger over the sensor the Arduino communicates with Processing and displays a change in color of the ellipses. The visuals looked something like this:

A little more information regarding Processing and why I’ve come to terms with how it’s relevant for us:

A little more information regarding the software:

  • Processing is a programming language based on a simplified Java syntax, hiding all the ugliest aspects of “proper” Java and making it effortless to get started with code-based experiments with a minimum of code experience. It’s a non-threatening tool for amateurs, hiding the complexities of compilation etc. from users who don’t need to know about them.
  • For students and enthusiasts Processing allows them to create computational sketches without being intimidated by tedious Java syntax.
  • For professionals Processing is a Java framework providing support for a wide range of creative code activities, from interactive tools to data visualization or sensor-driven applications (like the basic application we did). Accessed as a proper Java package hierarchy, Processing is a well designed code API that makes basic tasks trivial and facilitates the introduction of advanced techniques by providing an extensible library framework.

Processing is extremely useful for many things to many people, all dependent on your perspective. It is a flexible sketchbook software and a language for learning how to code within the context of the visual arts, as I’ve mentioned above. It promotes software literacy within the visual arts and visual literacy within technology. Students, artists, designers, researchers, and hobbyists use Processing for learning and prototyping. Therefore, as a Interaction Design major undergoing a Prototyping course, Processing is a useful tool that is crucial for growth as a designer.

QWOP 2.0

This is a follow-up of the cardboard game-controller exercise. To read more about the process leading up to this project, including the introduction to Arduino, read here.

As the previous journal entry regarding this project states, our final plan was to create seesaw boards for the feet with a cardboard base. Each board represents a leg, and the four widths of the two rectangular boards will be represented as a button to press. These buttons will be executed using the Arduino board, creating buttons with the Arduino editor, and copper tape for contact. The project brief states for the game controller to afford more than one player as a “multiplayer game”, even though the game usually involves one person. Hence why the idea of having two feet board was formulated.

Related image

As I’ve stated earlier, the seesaw affords the motion of leaning back and forth, or swinging back and forth, so we thought it was a perfect way of implementing it into our controller design because it also incorporates the movement of legs to further enhance the thrill of it being a “running” game. These two seesaw boards also only afford four buttons as it’s impossible to maneuver the seesaw in the other direction (horizontally- left and right), which is appropriate for our four-buttoned game.

On the previous day of working with this project, we had completed the software part, which was coding the “buttons” on the Arduino board using the Arduino online editor. A fifth button was also added in addition to the four buttons used for the seesaw controller to represent the space button, which you may press when you lose the game and would like to restart.

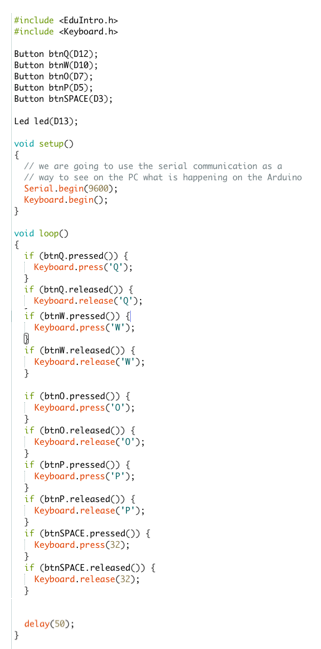
The code on the Arduino online editor looked something like this →

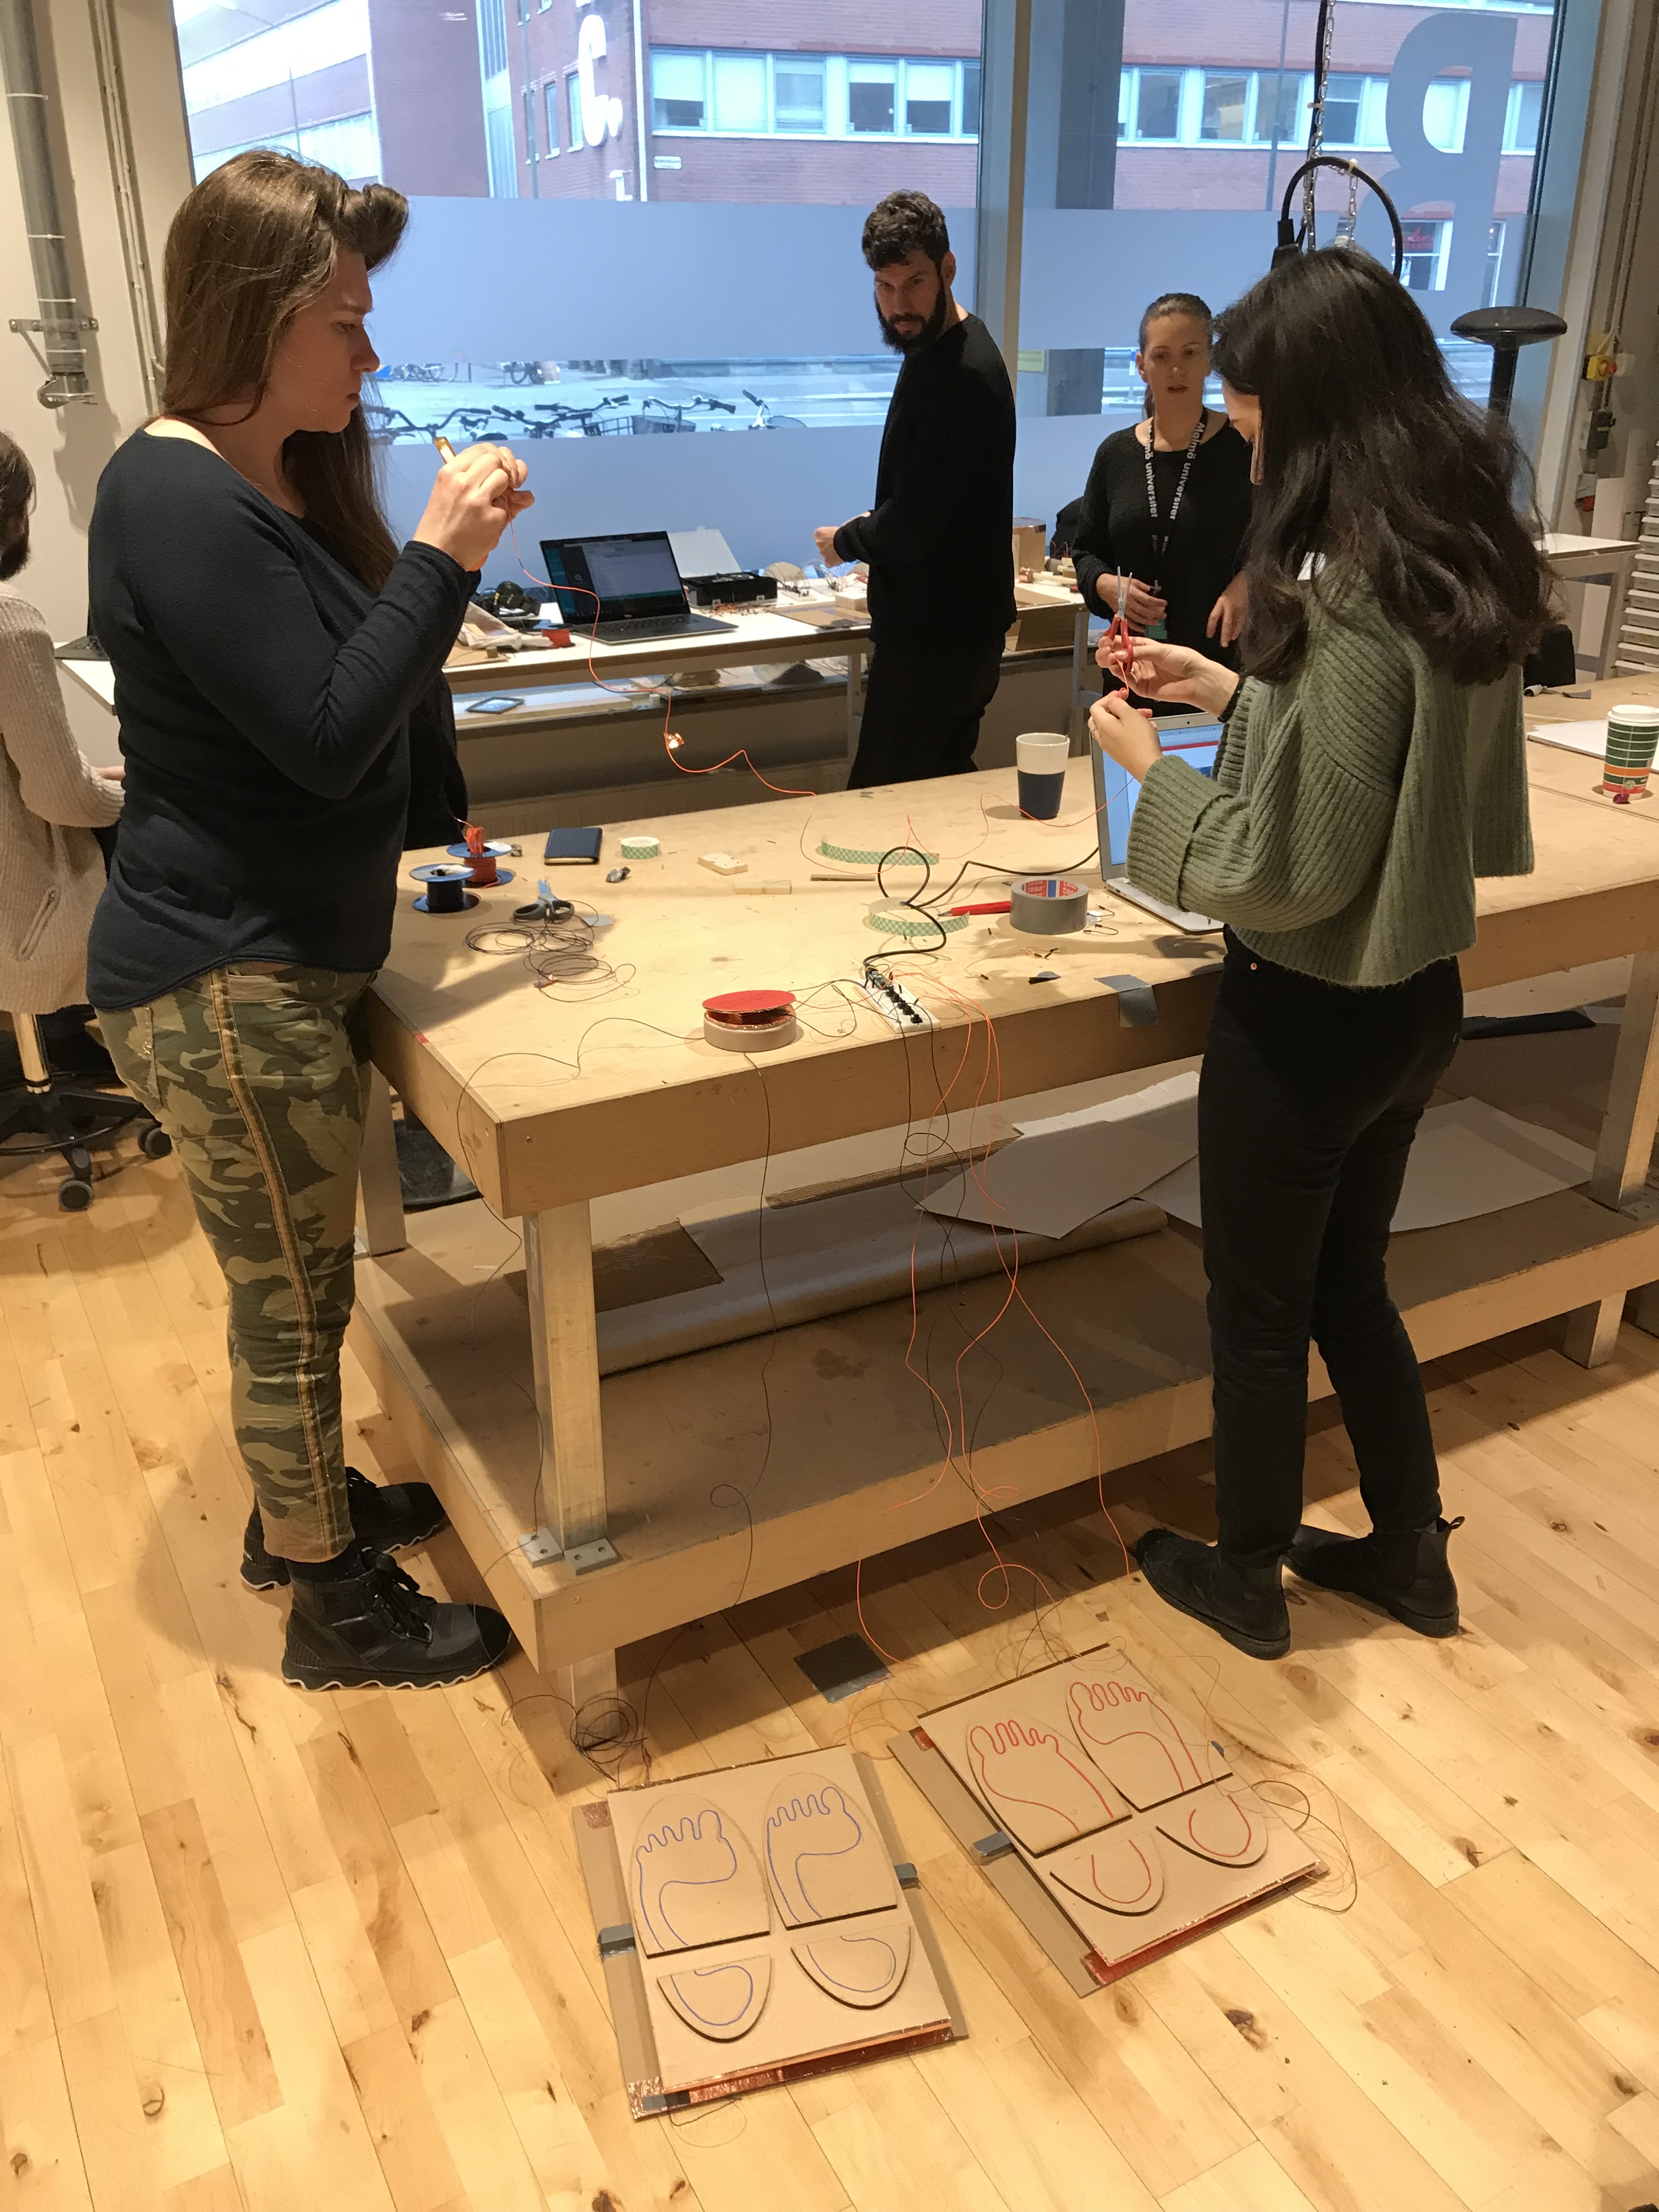
As you can see, five buttons are created and all placed on a different pin, I first checked if this worked by physically attaching the five buttons on the board. It worked fine. So how did we implement these buttons onto the controller? The process is simple. After completing all of our parts to the seesaw; including the more sturdy top boards with footprints as design to illustrate which leg each board represents, two thin but sturdy long blocks of wood placed between the bottom foundation and the top board which the top board balances on, and the foundation board at the very bottom, we were ready to connect our wires and copper tape, each width edge of the seesaws get two long strands of copper tape to ensure that they are able to make contact when you lean backward or forward, that means a copper tape was attached to both the bottom of the sturdy top board and one to the top of the foundation, so when you lean towards one direction the bottom of the sturdy board will make contact with the foundation cardboard, which triggers the button press! I will attach some images so all of these make a little more sense with the assistance of diagrams.

As you can see here, each button represents either the thigh or the calf of the left or the right leg. Q- left thigh, W- right thigh, O- left calf, P- right calf
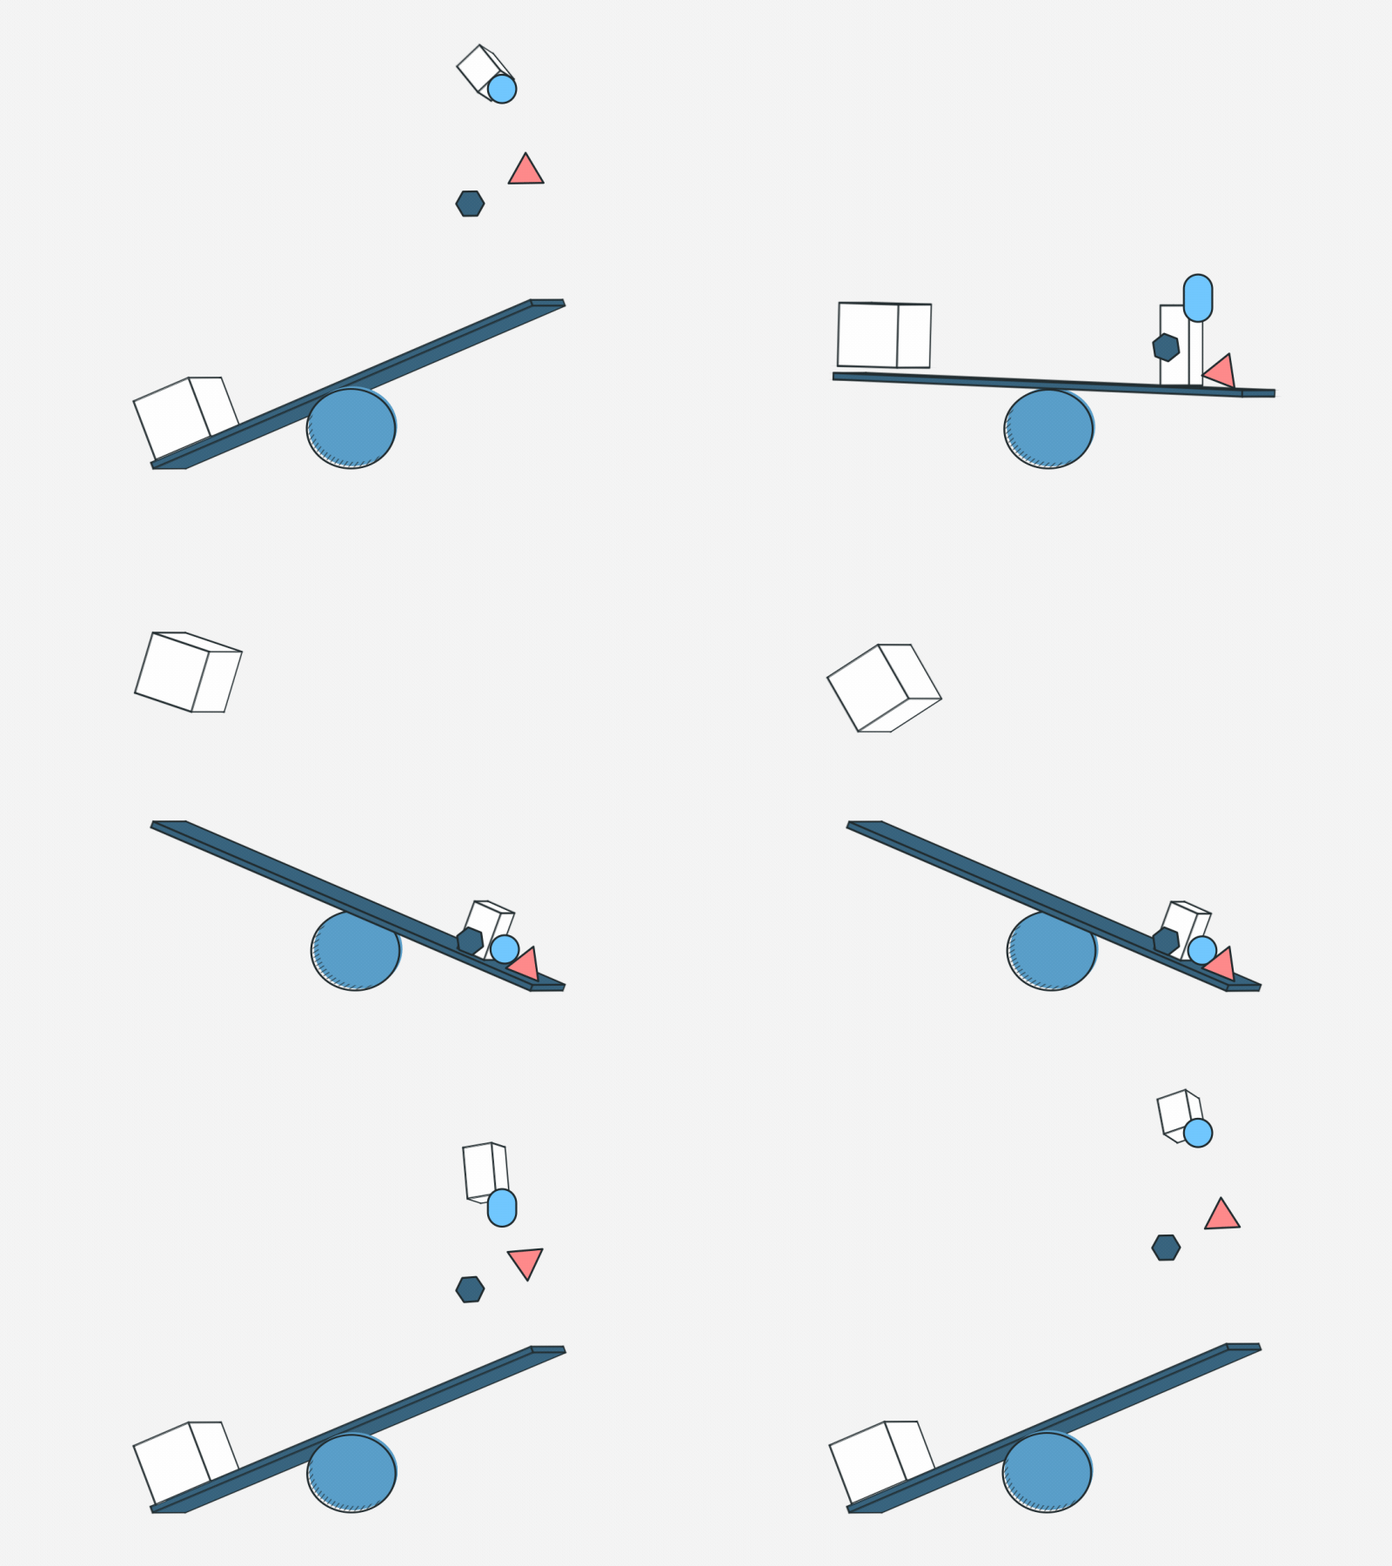
This diagram better illustrates which button you press depending on which direction you lean towards.

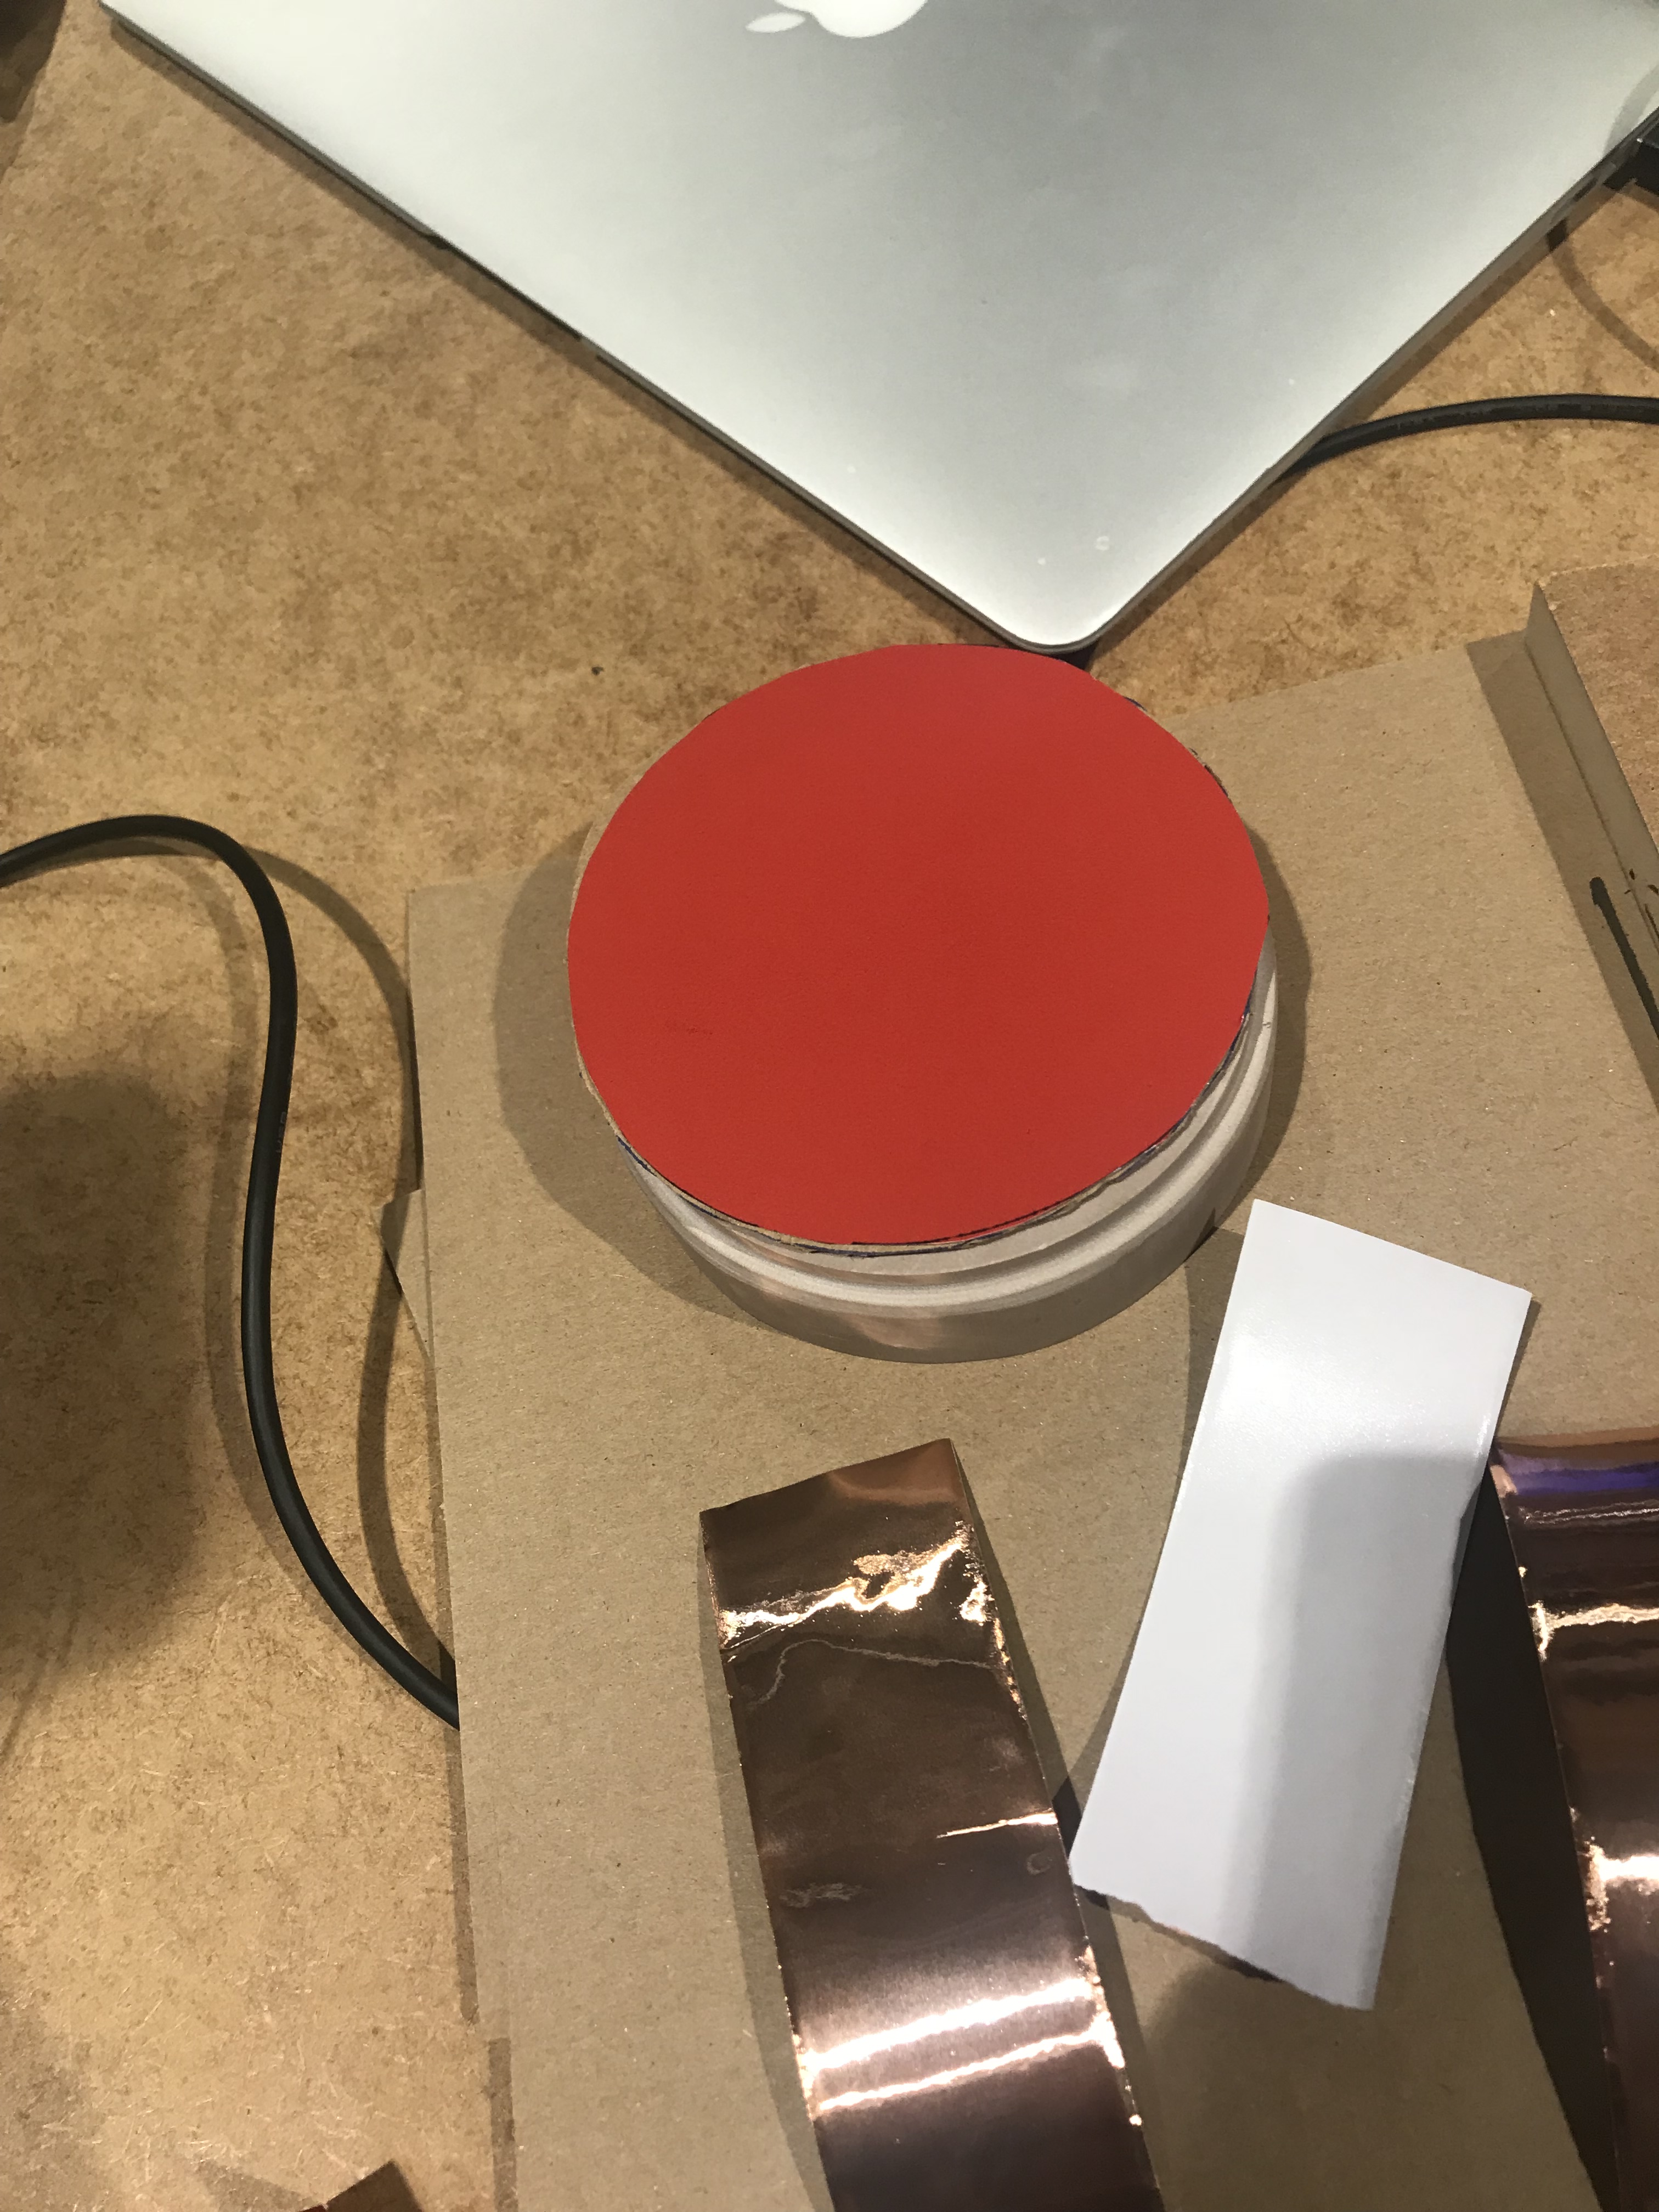
We also created a restart button after discovering a round block made up of some material that resembled concrete… which had the perfect size for our button. We attached a self-made spring using a long strand of paper to the centre of the circle, and a round piece of cardboard with the same area as the concrete button foundation to create a device that resembles an actual button! We covered the entire area where the bottom of the cardboard layer makes contact with the top of the concrete foundation with copper tape to simulate the pressing of a button. This however, didn’t work well when we began the actual game run-throughs as the contact is not as effective as the boards and people tend to resort to pressing the space bar on the computer keyboard instead.

As you can see, the top layer comes in contact with the bottom layer when you press hard enough for the copper tape to come in contact, the spring holds the top layer up so the button is not constantly being pressed

With all of this complete, we were ready for the actual game play! Overall, people thoroughly enjoyed the experience of the game and the controller did not fall apart at all, we were worried about people leaning back and forth too vigorously and how that might break the controllers but this didn’t occur at all. As I mentioned earlier, the space button did not work as well, people tend to resort to the space key on the laptop after one or two tries with our button. This game is intentionally created to be hard to beat, even with the keyboard, so nobody was able to run the full 100 meters, but some went as far as 15 meters, impressive. Take a look at other users trying out our game in the GIFs below:

Learning outcomes?

This was a useful prototyping exercise, I’ve mentioned a couple of times in different journal entries about the significance of prototyping and this short but rewarding project brought that to life.

Why is cardboard prototyping relevant? Cardboard prototyping is a common lo-fi method to prototype and test physical objects and environments. This assists further exploring and validating core functionality and the role of these objects in the context of the future service, therefore, cardboard prototyping is often used in conjunction with or as part of walkthrough approaches, like our game controller. Prototypes made from cardboard are cheap and very easy to create, like paper prototypes, they’re created to be thrown away. This makes it easier for those who created the prototype to let go, reflect, and embrace the necessary changes.

The most important part of cardboard prototyping is the process of prototyping itself. It helps to concretize the initial concept and explore its details, strengths, and weaknesses. 

Watch this video story that visits controllers from other multi-player games created by other groups!

Make something interactive… with cardboard!

After a long wait, we’ve finally been introduced to the Arduino!

What is the Arduino? based on the introduction found on Arduino’s webpage, Arduino is an “open-source electronics platform based on easy-to-use hardware and software. Arduino boards are able to read inputs – light on a sensor, a finger on a button, or a Twitter message – and turn it into an output – activating a motor, turning on an LED, publishing something online. You can tell your board what to do by sending a set of instructions to the microcontroller on the board. To do so you use the Arduino programming language (based on Wiring), and the Arduino Software (IDE), based on Processing.”
Arduino is a handy tool for quick and lo-fi prototyping, it’s easy to learn even for students without a background in electronics and programming. Finally, we’re combining our knowledge of programming and implementing it onto 3D physical prototypes!

For this course, we were introduced to the MAU starter kit using the Arduino Micro 5V. David introduced us to the web editor and the client which we needed to register and install. After getting familiar with the Arduino and the breadboard itself, it was time to be introduced to our first button.

With this button installed and functioning, we could proceed and work on so many potential projects. While installing the button and trying to make it work, I encountered several challenges, mostly the breadboard being confusing on its own, and where to plug each wire. With the assistant of a TA, I was able to figure out that the breadboard is made up of rows of metal clips, called terminal strips, and each strip is electrically connected. Which means if you stick a component to the board’s hole A1, it will be electrically connected to the holes B1-E1, but not A2 because that’s in a different column, and it won’t be connected to holes F1-J1 either, because they are separated by a gap. The button has two parallel rows of pins. The power rails on the two opposing sides give you an easy access to power (+ / – ), you can use the same power source on both sides by connecting the sides with jumpers, as indicated by the two red and black wires to the right in the image below.

The main challenge here is not being able to understand what to do under vocal command, after looking at diagrams provided on screen (as well as these learning cards that a researcher gave out while she was conducting research during class), I was able to understand the components better. Why is this button relevant? Buttons can represent the mouse-click motion as well as a key-press motion. So with this knowledge, we can build our own game-controller and use them to interact with and control a game of choice found online! The exercise for today was to form a group of three and create a multi-player collaborative, interactive computer game using only CARDBOARD. We are to create our own keyboard-based game-controller that utilizes interactions such as tilting, balancing, shaking, squeezing, jumping, hugging, throwing and so on. The goal is to create something unique instead of simple buttons.

Fun example:

After brainstorming with members of my group- Petra from Product Design and Josefine from my class, we settled on a game called QWOP. It’s a strange 100M dash game that is practically unbeatable and affords four keys from the keyboard, Q W O and P (five if you include the Space button). The runner looks ridiculous when moving forward because he is not able to stand straight, so the goal is to maneuver to the finish line (or at least a considerable distance) before collapsing and losing the game. Here’s a video that demonstrates the game-play:

We wanted an interaction that involves the movement of our legs and feet, simulating the “running” motion. For example, we brainstormed having cardboard attached behind our knees, and somehow making the copper tape coming in contact when we bend our knees, but that was pretty ambitious and difficult to execute. Then, we thought about attaching buttons underneath a table- and also attaching something on our knees, so when the knees move up and down you are pressing the individual keys to make the runner run. But that didn’t seem unique enough since we would more or less be creating simple buttons.

Our final plan was to create two feet seesaws with a cardboard base and wooden boards that are more sturdy on top. Each board represents a leg, so that two players can play together, then, since we needed four control buttons, we decided that when we lean forward on the board we’d come in contact with one button, and another when leaning backwards. That makes four buttons with two seesaws. The building process of this game will be written on a separate journal entry, titled “QWOP 2.0“, read this entry if you’d like to see our end result. For this day, we managed to complete the software for the game: creating five buttons on the breadboard Q W O and P as well as a Space button to restart, and also lay out a general plan for how we’re going to build our cardboard controllers: A start button that’s connected to the space bar, Q and O for the seesaw for the left leg and W and P for the seesaw for the right leg.

Prediction: This project will really give a sense of implementing code to a physical prototype, and actually getting the prototype to work will be extremely rewarding.

Introduction to Physical Prototyping!

Today in class Johannes introduced us to the course syllabus and as the course coordinator- how he plans to lay out the course in terms of structure. Post-lunch, Clint swept in and built upon our knowledge of prototyping in design practice.

Prior to this lecture, I understood prototyping as a basic concept used in a design process- building a physical representation of your design idea… and nothing more complex than that. It’s a handy tool to see your design come to life, even as a low-fidelity product made out of cardboard and paper. By making it three-dimensional, it’s allowing the yourself to actually interact with the product.

First up, we were introduced to Louis Valentine’s (Valentine, L. 2013) definition of Prototyping. His ornate use of metaphorical language defined prototyping as a more abstract yet extremely relevant concept. He utilized catchy metaphors to describe prototyping which really stood out to me ↓

  • “The friend we turn to when we are unsure.”
  • “As a teacher, she helps us to listen intently and see our mistakes, encouraging us to work through the difficulties and to achieve our best”
  • “Her capacity to bring out the playful side of our nature is inspirational, and when we fail to face our responsibilities, her reprimanding is respected.”
  • “Prototype has proven to be design and craft’s most loyal and trustworthy compatriot.”

Out of all these metaphorical definitions, I really liked the definition of prototyping being “A friend we turn to when we’re unsure”. I made a comparison to asking a close friend for relationship advices. The prototype itself provides feedbacks and insights based on how it performs, just like how the friend gives you feedback straightforwardly about your relationship.

In addition to the introduction to Valentine’s perspective of Prototyping, Clint provided more insights regarding Prototyping. Most of it revolving around the defining characteristics of prototyping: tenuous, material, and experienceable. That prototyping is used to understand a “situation”, with a range of methods used, prototypes seek to empathize, understand experience, and to identify requirements and constraints, It’s also vital to framing a problem. The challenges for prototyping include it being unable to articulate experience; it lacks language, power, and reflexivity to do so.

Early prototyping is important during design practice as it withholds commitment to a single concept, prototyping by sketching, lo-fi, disposable prototypes are commonly used. Multiple variations can be created and it keeps the designer “setting the problem ” rather than prematurely “solving the problem”, ultimately it leads to more innovative and quality design. In conclusion, the insights Clint provided summed prototyping up to be not a technique, but a stance or strategy, it’s doing design, and not a phase, it’s tenuous, material, and experienceable, and finally, designers primarily prototype to understand the situation, the material, and the concept.

Outcomes: 
Prototyping is extremely relevant in design practice and it surpasses the literal meaning of “prototyping” as an action. Prior to this session prototyping was simply a process which I was aware that designers and engineers go through during an innovative process in order to simulate an idea in low-fidelity without actually putting too many commitments, it helps you address potential issues of your final product before actually creating it. That being said, my assumptions were challenged as I simply saw is at a necessary and crucial part of a design process but not the reason behind its significance. This lesson solidified my understanding behind it and why every designer should take part of this process for a more successful outcome. For the upcoming projects I’ll be participating in, it would be extremely helpful to create more prototypes for a final product, analyzing it and picking out issues along the way. Instead of prototyping because “everybody does it”, from now on, my approach to it will be different, seeing as a vital strategy to creating a final product that will encounter less issues.